Showing posts with label rubber stamps. Show all posts

Wednesday, December 14, 2016

Lift Me Up! for #PCC223


Hello Stampers and crafters today's card is part of the Paper Craft Crew' s Weekly Sketch Challenge.  Each week we have a different challenge for everyone to join.  If you have followed me for anytime you know that I feel very strongly about sketch challenges.   Challenges are a great way for you to improve your design skills and build confidence.      

This weeks sketch is a fun and open sketch.  It leaves so much for you to play with and change to make your own, as you will see in each Design Team Member's projects.  Here's a look at this weeks challenge sketch.
http://papercraftcrew.com/

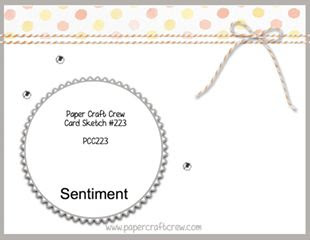
See what I am talking about this weeks sketch challenge is so open to interpretation.  You, will have so much fun creating a project for this weeks challenge.  Here's a look at the card that I created for this weeks sketch.

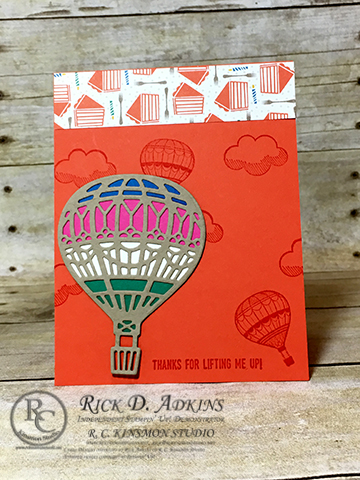
 Today's card is a very fun and festive card.   Today I am sharing with you products that will not be available until January 4th, 2017.  The major parts of today's card are all new product from the upcoming Occasions Catalog.  This is the first sneak peek that I have shared with you from the upcoming catalog.   If you don't have a demonstrator that you are working with I would love to send you a Occasions Catalog.

Tricks & Tips:  

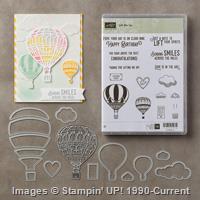
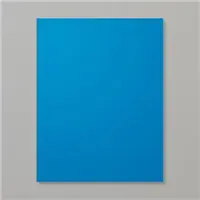
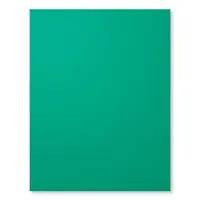
To cut out the hot air balloon you will want to use the the new Big Shot Platform along with the Precision Base Plate.  This combination will help you cut out the delicate hot air balloon thinlit out extremely easily.   I cut out the Pacific Point, Melon Mambo, Whisper White, and Emerald Envy strips with the matching thinlits that fit behind the delicate die.   To attach each piece I used the fine tip glue pen to adhere each piece behind the die cut.  I know that it looks harder than it really is.  Once you can order the supplies you will see what I am talking about.

First Things First: 

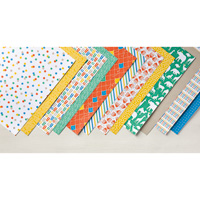
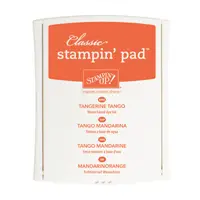
To start the card you want to stamp the images on the Tangerine Tango cardbase (4 1/4 x 11 scored at 5 1/2) in Tangerine Tango Classic ink.   Next attach the 1" x 4 1/4" piece of Party Animal Designer Series paper.   All the colors from today's card came from the colors in the Designer Series paper with the exception of Melon Mambo.   It was just a great compliment to all the Bright fun colors.
You really can not go wrong with any thing you put these colors together with.  They are such fun bright fun colors and they make everyone just happy.


Here's a final look at today's card.  I hope that you enjoy today's card, as much as I did creating it.  Remember that you can purchase these products starting January 4, 2017.   I hope that you play along with us this week.  I know that you will have a wonderful time playing along.   You have from today until Monday to upload your photo.  Click here to head over to the Paper Craft Crew's website to play along.

Thanks for dropping by and I will see you again tomorrow with a new post.

Promotions: 

https://www.stampinup.com/ECWeb/CategoryPage.aspx?categoryid=10600&dbwsdemoid=2154053


Products Used:


Monday, December 5, 2016

How to turn Stampin' Up!'s Christmas Magic & Merry Mice stamp sets into Christmas Ornaments!


christmas-mouse-magic-ornaments


Hello stampers and crafters I hope that you are not to busy with the hustle and bustle of the season, to not be doing a Christmas crafting.  Today I am going to share one of the projects that we did at our Christmas Giftables Stamp Camp back in October.  This project was designed by my Friend Thelma Collins, and I am going to share it with you.  She designed two different Christmas ornaments for our guests to make.   Here is a look at both projects.
christmas-mouse-magic-ornaments
On the day of the event I didn't get time to create my projects since I was teaching the project that I came up with.  So I sat down recently and created the projects we each created.  The version on the left was done just as Thelma designed it.  The version on the left was the second design she came up with but I did it with my own little twists.

Merry Mice Ornament:

christmas-mouse-ornament

Thelma used the retired circle framelits to create the circles.  The large circle was Old Olive, and the small one was Whisper White.   She stamped the little mouse image on the white cardstock and I colored it with Stampin' Write Markers. The markers used were Emerald Envy, Real Red, Dapper Denim, Crushed Curry, Old Olive, Garden Green, Crumb Cake and Blushing Bride.  We took half of a clear plastic ornament and added some of the mica flakes in the white to give it a appearance of snow, because come on how cute.  Once the snow was in place I glued the ornament in place.   To finish the ornament off and to be able to hang on the try, I added the Candy Cane Lane Baker's Twine.


Christmas Magic:

christmas-magic-snowman-ornament
For the Christmas Magic ornament I stamped the Snowman and the North Pole in Stampin' Up! Archival Basic Black ink.  Next I cut it out using the new Stitched Shapes Framelits using the largest circle.   Next I cut out a scalloped circle using the layering circle framelits in Cherry Cobbler.  I colored the images using Garden Green, Cherry Cobbler, Crushed Curry Stampin' Write Markers.   I added some blue to the background using my clear wink of stella brush pen.   I also added a little blue around the shadow areas of the snowman, and added a pumpkin pie colored carrot.   I then attached the circles together and attached the ornament to the cardstock.  I added some Candy Cane Lane Bakers twine at the top to hang on the tree.  To finish the ornament I tied a Cherry Cobbler bow using the 3/8" taffeta ribbon.

Tips and Tricks:

When creating the ornaments make sure you use about two tsp of the mica flakes.  That way there is not to much inside the ornament and it doesn't over power the stamped image.   My next advice is make sure you don't move the ornament around after putting the glue on the back.   It will save you from getting glue all over the cardstock, all over you, the table and more.
Here's another look at both ornaments.
Thanks for dropping by today, I hope that you enjoyed today's project and if you would like to pick up any of the supplies to create the ornaments (besides the plastic globe those can be picked up at any big box store) you can visit my online store.  Now is a great time to shop for the supplies to make these projects.  The stamp sets, ribbon, sequins, and baker's twine are all on the End of the Year Closeout Sale.  You can pick up the markers in my online store as well as a few of the other supplies.  Thanks for dropping by today.
signature-image


december-host-code-promo

yearendcloseout_shareables_eng_1

Product List

Thursday, November 17, 2016

Occassions 2017 Sneek Peak


As most of you know that I just got back from the OnStage Local in Atlanta a few weeks ago.  Well as a perk for attending we got to take advantage of the Product Purchase Premier, which means I got to purchase items from the new Occasions catalog that releases to everyone January 4th.   Normally we don't get to purchase items from catalogs until about a month before they go live (one of the perks of being a demonstrator), but one of the perks for attending the Stampin' Up! Onstage Event is the ability to take part in the PPP.   Now we don't get to order everything but we do get to order some select product.  So think about it this way, if you were to sign up for my team you would be able to order early too!

If you signed up to be a Kinsmon Crafter then you would be able to take part in the Preorder come December 1.  That means that you would be able to pay $99 and be able to pick $125 in products and that can include the Occasions catalog.  Not to mention that once you become a demonstrator you will be able to save at least 20% on all you orders.   You can take advantage of this wonderful opportunity  by clicking here!

Becoming a Demonstrator was one of the best things I could have done.  I get to meet people both in person and online.   I can handle by business as I want.  If I need to change schedules its up to me.   Another big perk is that I am not only part of a group but part of a world wide family.  
So here's my product sneak peek.  

Thanks for dropping bye today and I hope that you enjoyed my Occasions Catalog Sneak Peek.   Remember you have two months before this catalog goes live, So there is still plenty of time for the Holiday Catalog.   So I will be showing you things from the Holiday Catalog up until  almost the end of December.   I hope you have a wonderful day!


Links:
My Stampin' Up! Online Store: https://www.stampinup.com/ecweb/default.aspx?dbwsdemoid=2154053
My Stampin’ Up! Website: http://rckinsmonstuido.stampinup.net
Paper Pumpkin: https://www.paperpumpkin.com/en-us/sign-up/?demoid=2154053
Blog: https://www.rckinsmonstudio.wordpress.com
Website: https://www.rckinsmonstudio.net
Facebook: https://www.facebook.com/demorick
Instagram: https://www.instagram.com/rckinsmonstudio/
Twitter: https://twitter.com/Rckinsmonstudio\
Periscope: https://www.periscope.tv/Rckinsmonstudio
Pinterest: https://www.pinterest.com/rickadkinsartis/
YouTube: https://www.youtube.com/user/RickAdkinsArtist
Join my team: https://ida.stampinup.com?demoid=2154053

Monday, September 26, 2016

Quick & Easy Halloween Treats Card Video Tutorial

Hello Stampers and crafters thanks for joining me for today's blog/vlog post.  Today I am going to show you a quick and easy Halloween Card using the Halloween Treats stamp set from Stampin' Up! in the brand new 2016 Holiday Catalog.  If you have your catalog the stamp set is on page 58.   This stamp can be used for so many different things, from treat tags, to cards to scrapbook embellishments.   It's only as limited as your imagination.  Here's a look at my card for today.

halloween treat card.jpg 


This is such a quick card that you can make a ton with just a few supplies and a couple Stampin' Write markers.  What no ink pads?  Nope, just three markers, wow how easy and fun it that.  I actually show you in the video that I stamped it wrong the first time and still had time to redo it, and the video is still under 15 minutes long.
Here are a close up of both cards that I created.  I used Basic Gray as one card base and Pumpkin Pie as the other.   Just that simple change will change how the card looks.   But I wanted to show you that you can change things up and still have a great card.
halloween-treat-card-2 
halloween-treat-card-3 

Supplies needed:

  • Pumpkin Pie or Basic Gray 5 1/2 x 8 1/2 scored at 4 1/4
  • Pumpkin Pie or Basic Black  4 x 5 1/4
  • Halloween Night Specialty Designer Series Paper 3 3/4 x 5
  • Basic Black 4 x 2 1/2
  • Whisper white 3 3/4 x 2
  • Stampin' Write Markers in Old Olive, Basic Black and Pumpkin Pie

Video Tutorial:

Thanks for dropping by today and checking out my quick and easy Halloween treat card.
my signature

Links:
My Stampin' Up! Online Store: https://www.stampinup.com/ecweb/default.aspx?dbwsdemoid=2154053
My Stampin’ Up! Website:  http://rckinsmonstuido.stampinup.net
Paper Pumpkin: https://mypaperpumpkin.com?demoid=2154053
Blog:  https://www.rckinsmonstudio.wordpress.com
Website: https://www.rckinsmonstudio.net
Facebook:  https://www.facebook.com/demorick
Instagram:   https://www.instagram.com/rckinsmonstudio/
Twitter:  https://twitter.com/Rckinsmonstudio\
Periscope: https://www.periscope.tv/Rckinsmonstudio
Pinterest: https://www.pinterest.com/rickadkinsartis/
YouTube:  https://www.youtube.com/user/RickAdkinsArtist
Join my team: https://ida.stampinup.com?demoid=2154053

October  Host/Hostess Code:

E6AKUCFM
Use the above Host/Hostess code for your orders under a $150 and receive a special gift from me this month.  Gifts will be sent to you separate of your orders the following month.  If your order is over $150 please don't use the host code.   You will already receive a special gift from me and you get your Stampin' Rewards.


Product List

Template Designed by creativeworkerbee