Showing posts with label pumpkins. Show all posts

Monday, November 11, 2019

Kylie's Demonstrator Training Program Team Blog Hop


Hello and welcome to this month's Demonstrator Training Blog Hop.  It's Fall still even with the temperature that has dropped to a cool Winter chill.  But sometimes it happens that it starts getting colder during Thanksgiving.  Thanksgiving in the States is only three weeks away, and we all have a lot to be thankful for.  During this time of the year in the US we celebrate Thanksgiving a time to be thankful for everything in your life.  Over the last year there has been a lot of ups and downs good and bad that have happened.  I am thankful for so much during this season of thanks.  I am thankful for the time that my Baby brother had to stay with us during his recovery before his untimely passing, I am thankful for my supportive customers and friends.  I am thankful for being part of this training program again this year.  I am thankful for so many things so with all that in mind I wanted to create a card to represent these and all the other things I am Thankful for this season.  Let's have a look at my card. 


Basically for my card I used scraps of the Come Together Designer Series Paper and puzzle pieced these scraps into a design that was pleasing to the eye.  I like to refer to this as the Puzzle Piecing or Patchwork technique.  This is a fun way to create especially if you have hit a brick wall in the creative process.  By working in this technique you free up your mind to get past the blocks that could be keeping you from creating.  Once I had the design figured out I added mats to the designer series paper.  Some of the layers were popped up on dimensionals, some where just glued down using liquid glue.   After stamping the pumpkins I used my Wink of Stella to create a watercolor look on the pumpkins.  I cut them out using the matching dies, and added them to my card.  
If you are viewing this post on my wordpress blog you will have to click here to view the blog roll. 

 Blog Roll: 


Happy Stampin' 
Rick Adkins 


If you live in the US.  I would love you to choose me as your demonstrator.  If you would like to purchase any of these products you can click on the Shop Now Button or by clicking on any of the images below.  Alternatively, you can also contact me by email to place your order.  Please be sure to use the monthly host code and I’ll send a little something out to you the following month to say Thank You!  


November HOST CODE:  QU2TJBJN
1.     Spend any amount with me this month and receive the Creative Stampers Tutorial Bundle.  Plus get a gift from me in December.
Please remember that if you use the host code you cannot use that order towards my KCRP’s (Kinmon Crafty Reward Points) that would be double dipping and is not allowed.  For more information on KCRP’s click here.  


Three main reasons to Join!  
1.     You Get at least a 20% discount on all your orders while you are a demo.   
2.     You get to join my fun Kinsmon Crafters Team and Private Facebook Group.
3.     Access to directions to all my online classes 

Stampin' Up! Shopping List: 

Sunday, September 22, 2019

You Make Me Smile's Fall Color Inspiration featuring Harvest Hellos

Hello and welcome to my blog; today I am going to share with you my color inspiration for my You Make me Smile card featuring the Harvest Hellos Bundle.  Color drives most of our decisions and we don't even know it.  It's very important when crafting that you can find color inspiration and this is what I based this entire bi-weekly series on.  I get asked all the time where I come up with color combinations and there's inspiration out there everywhere.  It's just a matter of being observant and stopping and noticing all the beautiful colors around you.  I crated this series to help you find inspiration for your projects by sharing some of the ways I find mine.  Since tomorrow is the first day of Fall I drew inspiration from Fall leaves and harvest pumpkins.  Here's a look at my card.

Harvest Hellos: 

The Harvest Hellos Bundle includes the Harvest Hellos Photopolymer Stamp Set and the Apple Builder Punch.  The Harvest Hellos Stamp Set is an A+!  Use the apples for teacher or student gifts.  Then, like the autumn colors shifting from red to orange, the apple becomes a pumpkin with a spooky face!  The stamp set features 15 photopolymer stamps.  When matched with the Apple Builder Punch you can create beautiful die-cut apples (or pumpkins) for your projects. {* Largest punched image: 2-1/2" (6.4 cm)}  The Harvest Hello Bundle is in the Holiday Catalog on page 49.

Tips & Tricks:  

To start off my card I picked out the supplies that I knew I wanted to use.  I already knew my colors from picking my inspiration so I started out by picking the pumpkin stamp from the Harvest Hellos stamp set.  I stamped three of the pumpkins stems and larger leaves in Memento Tuxedo Black ink because I knew that I wanted to use my Stampin' Blends to color them.  To color I picked Pumpkin Pie, Daffodil Delight, Soft Suede, and Old Olive all in light and dark tones.  I started out coloring the pumpkins in light Daffodil Delight and then brought in the darker and slowly built up the colors to Pumpkin Pie as my darkest colors.  I did the same thing with the pumpkin leaves.  Once the pumpkin was colored I punched them out with the Apple Builder Punch.  I also punched out the stem but sadly the punch doesn't cut out this leaf but does do the other leaf design in the set. Since I couldn't punch that leaf out I had to pull out the paper snips and fussy cut it out.  Which was super simple to do.  

Once I had the main focal images cut out either by punching or fussy cutting I put them all together using a little liquid glue.  Next I picked my card base.  I knew the colors I was using but had to decided which one to use for the card base.  I went with my favorite color Crumb Cake.  I cut my Crumb Cake Cardstock to 5 1/2 x 8 1/2 scored at 4 1/4.  I then cut down a piece of the Regals Designer Series Paper  to 3" x 5 1/2".  Out of the four patterns in the this pack of paper I picked the gingham pattern in Cajun Craze.  I layered the designer series paper on a piece of Crushed Curry cardstock cut at 3 1/2 x 5 1/2" and then layered that on a piece of Early Espresso Cardstock that was 3 3/4 x 5 1/2".  I placed all my layered cardstock and designer series paper onto my card base.  Once I had everything stuck down it was time to start arranging the pumpkins.  Before I started layering my pumpkins I stamped the little curly cues that you normally see on pumpkins in Early Espresso ink on the designer series paper.  Once I had that stamped down I added the pumpkins.  The two on the sides I just glued them onto the card.  The center one I placed on Stampin' Dimensionals and placed on the center.  I tied a little double bow on the stem of the center pumpkin.  I stamped the sentiment on a little piece of Whisper White cardstock and made a fish tail banner.  I also popped it up on dimensionals.  This finished off my card.  

Pin Me!  

The photo below shows the key color inspiration along with the Stampin’ Up! Coordinating colors for today’s project idea that you can save or pin to Pinterest.  If you are viewing this post by email, you will need to click the title of the post to access my blog and pin.   You can view my entire project recipes by visiting my Color Inspiration Pinterest board by clicking here!  Make sure that you follow my board to be notified when a new color inspiration is added.
Thanks for dropping by today I hope that you have found a little inspiration from my card today.  If you live in the US.  I would love you to choose me as your demonstrator.  If you would like to purchase any of these products you can click on the Shop Now Button or by clicking on any of the images below.  Alternatively, you can also contact me by email to place your order.  Please be sure to use the monthly host code and I’ll send a little something out to you the following month to say Thank You!  
Happy Stampin' 
Rick 


Host Code and Free Gift:

September HOST CODE:  SQ2WWJZN
  1. Spend any amount with me this month and receive the Creative Stampers Tutorial Bundle featuring Fancy Fold or Interactive Projects.  Plus get a gift from me in October. 

Please remember that if you use the host code you can not use that order towards my KCRP’s (Kinmon Crafty Reward Points) that would be double dipping and is not allowed.  For more information on KCRP’s click here. 

Stampin' Up! Shopping List:

Paper Snips
[103579]
$10.00

Wednesday, September 18, 2019

Season of Smiles & Love

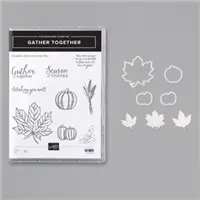
Hello and welcome to my blog; today I am going to share with you this sweet little card for my 12 Days of Fall mini series.  The card that I created today features the Gather Together Stamp Set from the 2019 Holiday Catalog.  This is the accentual Fall stamp set and is part of the Come to Gather Suite, which is geared all around Fall.  I just love Fall; all two days of it when we get one in Alabama.  The title of this post came from the beautiful sentiment that is part of this stamp set that reads "May this season bring your smiles and love that will last all year" I just think that this is just the most beautiful sentiment, and I think it would be perfect for a Christmas Card as well.  Here's a look at my card.

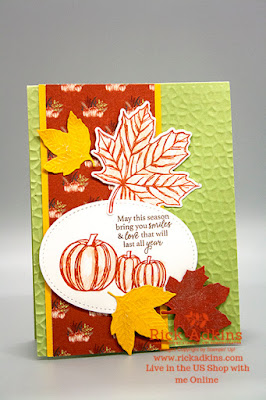
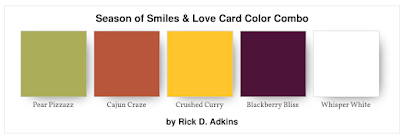
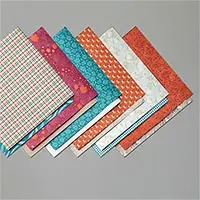
My card base is a piece of Pear Pizzazz cardstock cut at 4 1/4 x 11 scored at 5 1/2.  After cutting the card base I ran it through my die cutting and embossing machine with the Hammered Metal 3D Embossing Folder.  This added such wonderful texture to the card.  This embossing folder is one of the most striking ones we have had in awhile and just FYI it's extremely popular.  So much so that it was one of the first things to go on back order the first week the Holiday catalog went live.  And looking at the impression it makes I am not surprised at all.  Next I cut a piece of the Come to Gather Designer Series Paper to 2 1/2 x 5 1/2 and a mat from Crushed Curry Cardstock that was cut 2 3/4 x 5 1/2 and layered both of them on the right-hand side of my card using Multipurpose Liquid Glue.  Any time you have an embossed area you have to have a strong glue to adhere them together.  I prefer the liquid glue because it gets in all those little craves on the embossed piece.
Next I did my stamping; and I stamped the large leaf image from the stamp set in Cajun Craze and used the matching die to cut it out.  While I was cutting the large leaf out I threw on some scraps of Crushed Curry and Cajun Craze Cardstock and cut out a few of the smaller leaves as well.  The small leaves dies not only cut the leaves out but they emboss the vines of the leaves as well.  Which by the way are very very striking.  
At this point I stamped the three pumpkins from the stamp set in Cajun Craze ink and the sentiment (which I mentioned above) and ran it through the die cutting machine with a large stitched oval from the Stitched Shapes Dies.
At this point it was time to start putting everything together.  So I started out with my sentiment and placed it where I wanted it and attached it with a few Stampin' Dimensionals.  Then I started arranging my leaves around it.  Once I had the arrangement I wanted nailed down I snapped a photo of it with my phone so that I could remember where everything goes.  Yes, I am that person that would forget in just that short amount of time where things where going.
 After the  quick little photo shoot I started attaching the leaves.  Some where attached with Multipurpose liquid glue and some was attached with dimensionals and some with both.  For example the Crushed Curry leaf coming off the sentiment it was attached with a little liquid glue where it hits the sentiment and a dimensional under where it came off so that it would be the same height.  Same thing with the little Cajun Craze leaf.  The large leaf is just attached with liquid glue.  I bet the stem of the leaf up over the sentiment and tucked the other part of the leaf under.
That finished my card for today, I hope that you have enjoyed this little series of Fall themed projects over the last few weeks.  I will see you tomorrow with another project and a video tutorial.  See you soon.
Happy Stampin' 
Rick 

If you live in the US.  I would love you to choose me as your demonstrator.  If you would like to purchase any of these products you can click on the Shop Now Button or by clicking on any of the images below.  Alternatively, you can also contact me by email to place your order.  Please be sure to use the monthly host code and I’ll send a little something out to you the following month to say Thank You! 


Stampin' Up! Shopping List


Template Designed by creativeworkerbee