Hello and welcome to my blog; today is day four of Treat Week 2021. And, I have a super cute little project for you featuring the You Are Amazing Stamp Set and the Paper Blooms Designer Series Paper. The Paper Blooms Designer Series Paper is a free Sale-A-Bration Item currently, and the You Are Amazing Stamp Set coordinates with the You Are Amazing Project Kit. So, for today's project I created a gift box that will hold one of the jar Candles from Target's Dollar Spot. Here's a look at my project.
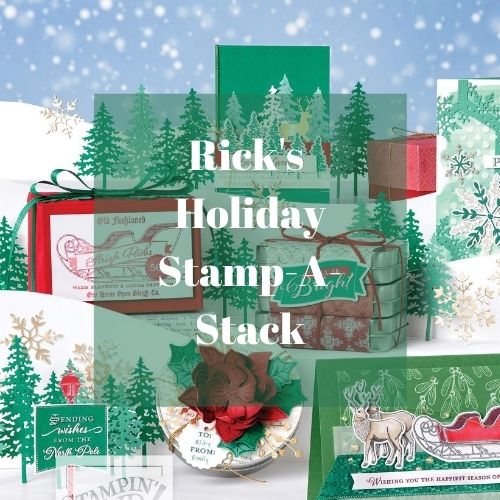
The Holidays are approaching fast! Do you want to get a jump start on your Christmas Cards! Beat the Holiday Rush join me for my Holiday Card Stamp-A-Stack!
Saturday, September 19, 2020 from 10 am to 5 pm CST live in my Zoom Classroom as we make 16 cards (4 each of 4 Designs). Each design will be easy to recreate if you need to make more.
How do you join my Holiday Stamp-A-Stack well you have two different ways?
Option 1: You pay the small fee of $30 which will cover all the cardstock and envelopes in your card kit.
Option 2: Place a $40 (before shipping and tax) order in my Online Store using the host code AN46S6GE by September 8th. And you will automatically be in the class. I will send you the card kits and envelopes for FREE as a thank you for ordering.
Deadline to RSVP and Prepay or order using the host code is September 8, 2020. After that I will start cutting all the cardstock for the event and get them in the mail to you before the event on September 19th.
If you want to create the cards just as I do that day, we will be using the Christmas Means More Stamp Set found on page 29 of the August-December Stampin’ Up! Mini Catalog. But you can use whatever you have in your stash. I will also teach you to use up some of the designer series paper you may already own.
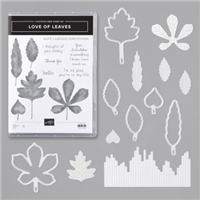
Hello and welcome to my blog; today I am going to share with you how they made the super cute sample on page 49 of the August-December Stampin' Up! Mini Catalog, the Love of Leaves Window Card. This was a super cute sample that caught my eye as soon as I saw it in the catalog. I love the designer series paper, the bundle, the whole shabang! Here's a look at the card.
Tips & Tricks:
This is a super easy way to create a window card and as I am sitting here typing this post you could easily make this into a shaker card as well with ease with the addition of some window sheet and sequins. I am just going to throw that out there so don't be surprised if you see this card turned into one in the near future. But to make the card as is in the catalog this is how I did it. I took a piece of Thick Whisper White Cardstock and cut it at 4 1/4" x 11" and scored it at 5 1/2". I then attached a piece of the Plaid Tidings Designer Series Paper cut at 5 1/2" x 4 1/4" and attached it to the complete front of the card.
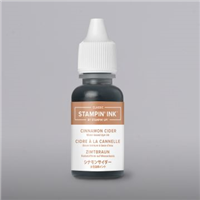
I then cut a piece of Cinnamon Cider Cardstock to 4" x 5 1/4" and took the Hello stamp from the Love of Leaves Stamp Set and stamped it repeatedly on the cardstock in Cinnamon Cider Ink. I then cut out the leaf shaped opening with one of the leaf dies from the Stitched Leaves Dies. Which by the way are a very unique set of dies, there is stitching around the cut edge of the outline. To get the stitching on the inside of the leaves you have another die that layers on the inside to do the stitching there. I placed this layer over the card base attaching it with Stampin' Dimensionals to give it left off the card base. I know super easy right.
I then added a little piece of the 3/8" Embroidered Ribbon to the front of the card with Stampin' Seal and took a piece of Pretty Peacock Cardstock (just a scrap piece) and stamped my sentiment in Versamark Ink and added White Stampin' Emboss Powder to it and heat set it with my Heat Tool. This was added to the card front with Stampin' Dimensionals over the ribbon. To finish off the card I added a few of the White enamel dots from the All the Trimming Embellishments.
Video Tutorial:
If you are viewing this post by email you may have to click here to see the video. Not all mail servers will show the embedded video.
Project Recipe:
I have created a little graphic for you to save to your Pinterest Board in case you would like to recreate this project with all the key items listed. You can check out all my Project Recipes here.
Here's a look at the version of the card that I made in the video with a different piece of the Plaid Tidings Designer Series Paper.
Thanks for dropping by today! I hope that you are enjoying this weekly series and that you are finding it helpful. If you would like to see a certain sample in one of the current Stampin' Up! Catalogs done leave a comment below with the stamp set, bundle, and page number of the sample and I will see if I can tell you How They Made That! If you need any of the supplies you have seen today you can pick them up in my online store by clicking on the item in the shopping list below.
Happy Stampin' Rick Adkins
Use the Host Code on any order of $35 (before taxes & shipping) or more by September 11th and get invited to my September Monthly Card Class as a Thank You. ($25 value) If your order is $150 or more, please do not use the host code. You will forfeit your Stampin' Rewards if you do; and I want you to get those rewards.
If you place any size order with me during the month of August, you will receive the August Creative Stampers Tutorial Bundle from me as a little thank you. This month's tutorial bundle has ten project tutorials that feature our favorite new Cozy Critters products from one of the new Stampin’ Up! Catalogs. The Creative Stampers Tutorial Bundle can either be earned for FREE with any size order or Can be purchased for $22 from me.
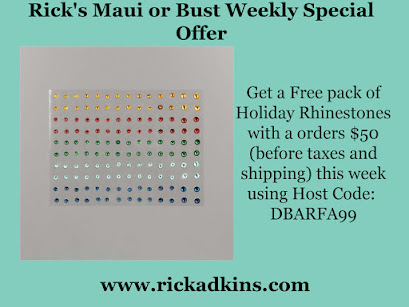
I am very close to earning the 2021 Stampin' Up! Incentive Trip to Maui and your orders can help me get there. I am running a few special promotions until the end of September to not only help me earn this trip but to help you save a little cash as well.
Join me for an exclusive Online Stamp a Stack for World Card Making Day! This is an exclusive event for my customers. We will make 10 different cards during the event you can use whatever stamp sets you would like. To join me it’s super simple place a $100 order before shipping and taxes in my online store using the provided host code attached to this link. I will send you an invitation to this exclusive event. You will not find these projects posted anywhere online. And, at the end you will have a stack of cards to send out for World Card Making Day this year and all year long.
I will have a new smaller promotion each week that runs from Tuesday of one week till Monday of the following week. You will find the smaller promotions posted on my Facebook Business page each week. So be watching for those as well. Some promotions will only last a couple days. Shop Now for this offer!
With each $1000 I earn I will be cutting off a chain from my Maui or Bust Countdown Chain.
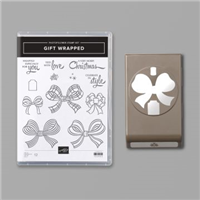
Hello and welcome to my blog; today I am going to share with you a super simple little card using the Gift Wrapped Bundle from the August - December Mini Catalog. This is typically a Christmas Stamp Set but you can stretch it by using a greeting stamp set for so many other occasions. This was one of the items on my Top 10 List that I shared last week. If you missed that post you can check it out here. Here is a look at the birthday card I made using this set.
Tips & Tricks:
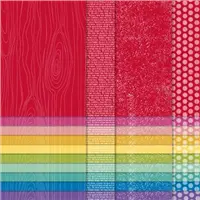
As I mentioned above the Gift Wrapped bundle is not necessarily just for Christmas! You can change the colors of the bows and add an additional greeting set to it and make projects for any and all occasions which is why I think it's a must have in your crafting stash. There are so many different uses for bows and not just for Christmas presents. You need bows all year round. So I took this bundle and made a birthday card with it. To start off I picked some very untraditional colors that you wouldn't think of for a Christmas set. I used Daffodil Delight, Flirty Flamingo, and Whisper White on my card today. You could also use this same set and color combination to make a card for a baby shower for a little girl.
After picking the color combination I started the building process. I stamped one of the bow images from the stamp set in Memento Tuxedo Black Ink onto a piece of Whisper White Cardstock. I used my Flirty Flamingo Stampin' Blends to color it. I then used the matching Gift Bow Builder Punch to punch it out.
Next, I took a piece of Daffodil Delight Cardstock and cut it to 4 1/4 x 11" and folded it in half to make my card base. To that I added a 1" x 5 1/2" strip of Flirty Flamingo Designer Series Paper from the Brights 6 x 6 Designer Series Paper and attached it to the card base. I cut another piece of the same paper to 3" x 4" and layered that to a 3 1/4" x 4 1/4" piece of Whisper White which I popped up on the card base with Stampin' Dimensionals. I wanted this to be representative of a birthday present.
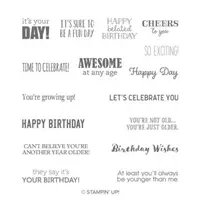
After that was all in place on the card base I took a 1/2" strip of Whisper White cardstock and one of the sentiments from the Itty Bitty Birthday Stamp Set and stamped it in Daffodil Delight Ink. I used both the Lovely Label Pick a Punch and the Banner Pick a Punch to add a little bit of interest to the both ends and to make it look like a tag hanging from the bow. Before attaching the long skinny tag I placed the bow onto the card front with a Stampin' Dimensional. Then I attached the little tag tucking one end under the bow with Mini Glue Dots to finish off my card.
Card Recipe:
I have created a little graphic here that you can pin to your Pinterest Board to help you remember what I used to create this page if you wanted to recreate it. If you want to check out all my other Project Recipes you can do so on my Recipe Board by clicking here.
Thanks for dropping by today If you need any of the supplies that you have seen today you can pick them up in my online store by clicking on the items below in the shopping list. In case you are wondering I am getting ready to cut off my first chain from my Maui or Bust Promotion going on right now. I also will be releasing the first promotion a little later today so be watching for that.
Happy Stampin' Rick Adkins
Use the Host Code on any order of $35 (before taxes & shipping) or more by August 14th and receive my August Monthly Card Class Kit & Invitation to my Zoom Live Class featuring the Ridiculously Awesome Stamp Set as a Thank You. ($25 value) In the Kit you will receive the supplies to make four different card designs. If your order is $150 or more, please do not use the host code. You will forfeit your Stampin' Rewards if you do; and I want you to get those rewards. Monthly Card Class Kits will be mailed to you by August 22nd.
If you place any size order with me during the month of August, you will receive the August Creative Stampers Tutorial Bundle from me as a little thank you. This month's tutorial bundle has ten project tutorials that feature our favorite new Cozy Critters products from one of the new Stampin’ Up! Catalogs. The Creative Stampers Tutorial Bundle can either be earned for FREE with any size order or Can be purchased for $22 from me.