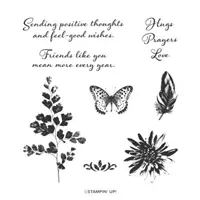
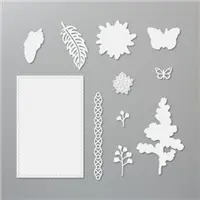
Hello and welcome to my blog; today I am going to share with you the card that I created for the Paper Craft Crew Inspirational Challenge this week. The inspirational piece this week has a very Spring like feel to it, or even could be used for a wedding. I picked the Positive Thoughts Stamp Set for the main focus of my card. Positive thoughts are exactly what you get in the Positive Thoughts Stamp Set. Use the images and phrases in these stamps to create a bouquet of affirmation for someone you love. Here's a look at my project.
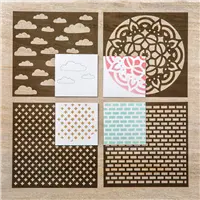
Here's a look at this week's inspiration image. You can
click here to visit the Paper Crafts Crews Site and check out what the other design team members came up with.
Tips & Tricks:
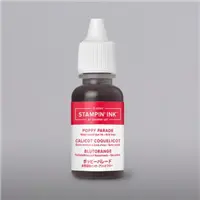
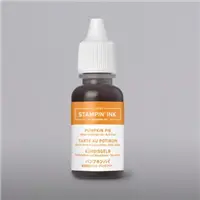
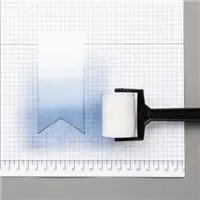
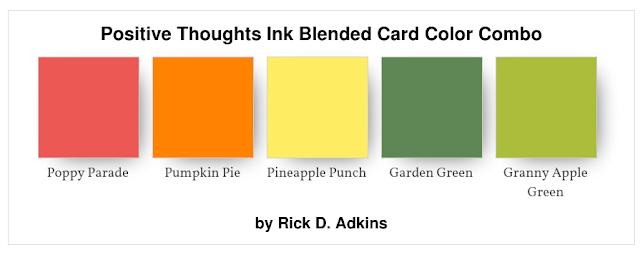
I started out my using my Sponge Brayer and inked up the card base made from a 4 1/4 x 11 Thick Whisper White Cardstock. I didn't do a very heavy coat of the inks that I used because I knew I was going to come back and add the geometric shape from the Pattern Party Decorative Masks and do another layer of ink blending. I used the following colors on my card and I am going to list what I used for ink blending first then the two greens for the flower bouquet. Poppy Parade, Pumpkin Pie, Pineapple Punch, (ink blending) Garden Green & Granny Apple Green inks.
After the ink blending it was time to do a little stamping. I stamped all the images on
Whisper White Cardstock. I stamped the flowers from the
Positive Thoughts Stamp Set first. I did a little first and second generation stamping for the flowers because I wanted a couple that was just a little lighter than just straight
Poppy Parade. This is a great way to get more mileage from your ink pads. I then stamped the foliage from the stamp set in
Garden Green and
Granny Apple Green Inks. I then stamped the butterfly in
Pineapple Punch Ink. Now I will go ahead and tell you that currently as part of the
Coordinating Product Release there are matching dies (
Nature's Thoughts Dies) for this stamp set. Now I do not have these dies because when I ordered the products in the
Coordinating Product Release I forgot to order this one set (Head Smack!) So since I didn't order them I had to fussy cut out each of the stamped images with my
Paper Snips. In reality it really didn't take to long to do, but could have gone much faster with the dies.
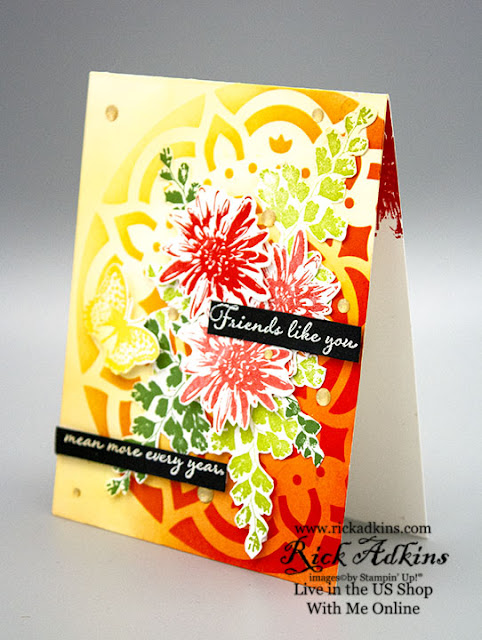
After cutting everything out I started my arranging of all the pieces. I used a trangliur arrangement to place the flowers and foliage. I cut some of the foliage smaller and piecemealed them into the arrangement. Once I had my arrangement set it was time to start gluing things down. I used a combination of Multipurpose Liquid Glue and Stampin' Dimensionals to attach everything. I popped two of the flowers up on Dimensionals along with the butterfly. I also added a dimensional under the end of one of the foliage pieces to add just a little lift them so they were not all just glued down flat.

To finish off my card I stamped my sentiment onto some Basic Black Cardstock with Versamark ink so that I could add my White Stampin' Embossing Powder before heat setting. Once I had my sentiment heat set I cut into two pieces so I could add a little more interest to my card. I then added the finishing touch to the card but didn't want anything to over powering; finally I decided on the Gold Glitter Enamel Dots that was part of the Christmastime is Here Suite that was released in November. These little glittering golden bits of fun add just the right touch to finish off my card. They are not to big, not to small, but just right as Goldie Locks said.
Thanks for dropping by today! I hope that you will take a little time and play along with this weeks Paper Craft Crew Challenge. You will find the entire shopping list of supplies that I used listed below.
Happy Stampin'
Rick Adkins
Join my team during Saleabration and you will get the super cute Mini Cutter and the DSP Sampler Pack free in your Starter Kit along with a Free Paper Pumpkin, Business Pack, a FREE Stamp Set of your Choice in addition to the $125 of product of your choice for $99.00 with Free Shipping. That's $277.75 of products and supplies for only $99.00 (Price includes the Well Said Stamp Set (most expensive in catalog) plus 9% sales tax)
Receive the February Creative Stampers Tutorial Bundle with any size order! This month our tutorial bundle has 17 tutorials featuring projects using Sale-a-bration Items!
Stampin' Up! Shopping List: