Hello and welcome to my blog and the One Stamp At A Time May Blog Hop! This month our theme was Manly May so we all created projects with the guys in mind. I decided to do a little sneak peek at some of the new products coming out soon in the 2020-2021 Stampin' Up! Annual Catalog. I picked the World of Good Suite to feature in my little sneak peek today, and it was perfect for some manly projects. Here's a look at my projects for this month.
Adventure Awaits:

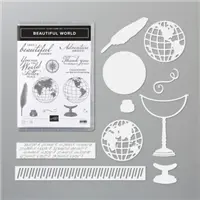
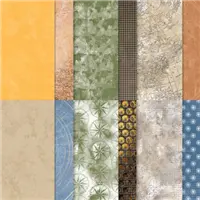
More my card this month I featured the Beautiful World Bundle along with a few other products that will be coming soon. Currently the only way to get these products is being a demonstrator. You can add them to items that we got to preorder in your starter kit. I started out my card by picking which designer series paper from the World of Good Specialty Designer Series Paper I wanted to use. I went with one of the ones with the brass foil accents and Cinnamon Cider backgrounds. I mean really I could have picked any of them and I would have been happy. I've never seen a pack a of paper that is so wonderful.

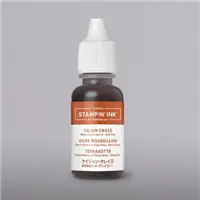
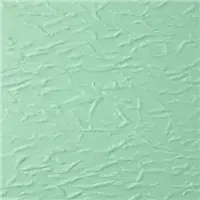
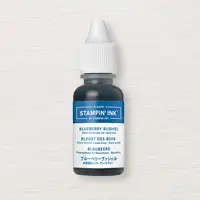
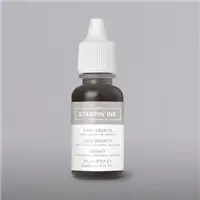
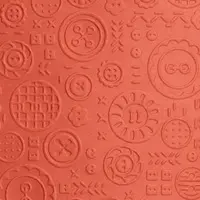
Once the designer series paper was selected it was very easy to move forward. I took a piece of Cinnamon Cider Cardstock and used the Old World Paper 3D Embossing Folder to create a fun texture to it. I loved that I didn't have to take my cardstock and crumple it up throw it on the floor and stomp on it a couple times to get this texture. You all know what I am talking about; we've all done it! Once I embossed the cardstock I took my Versamark and Early Espresso Ink Pads and ran very lightly over the surface. I wanted the raised edges to pick up the different colors. Since we could not preorder the New In Color Ink Pads I had to figure out how to get the look of the Cinnamon Cider with out having it. So the versamark on the colored cardstock was my best option. Now you may be wondering how I got a close color on the world with out having the ink pad. Well, I sat down with a few ink refills and started mixing them in different ratios and watering them down to get the color I wanted. It's not an exact match but it's close.

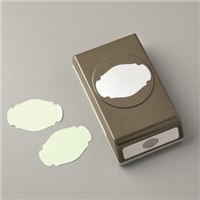
My sentiment was added with the new Lovely Labels Pick A Punch which is going to go on back order quick because it's going to be so popular. You can create six different punched labels with just this one punch. LOVE IT!!! I used a 1" strip of Early Espresso Cardstock for the back piece and a 3/4" strip of Cinnamon Cider Cardstock for the label I stamped the sentiment on.
Life's a Beautiful Journey Box:
So for my 3D project this month I kept with the same suite of products and same color scheme and came up with a super cute box, that I just love. I don't always love my 3D projects each month but this one is hands down my favorite. Here's a look at the box.

I repeated the same embossing as the card but instead of adding both the Versamark and the Early Espresso Ink, I just did the Versamark. I personally like the this better than the two colors, but you can let me know which you prefer. The final measurement of the box is 4 1/2" x 2" x 3". So, you can see it's a nice size little gift box. After embossing everything I added the embossed pieces to a Whisper White mat that's 1/8" different all the way around the embossed layers. I then added it to the box which I made from a piece of Early Espresso Cardstock.

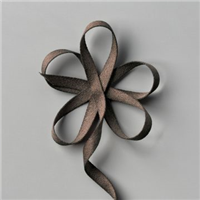
Once I everything put together I stamped one of the worlds from the Beautiful World Stamp Set and used the matching dies to cut it and stand out. I stamped the world on Cinnamon Cider Cardstock in Early Espresso Classic Ink. The stand was stamped on Whisper White Cardstock as well as the sentiment. I then tied some of the Early Espresso 1/4" Faux Suede Trim around the box and tied it in a bow. Which by the way actually ties very easily. Next I added the world and stand to the top of the box with a few Stampin' Dimensionals. I punched out the sentiment using the Story Label Punch: Which I attached with a little liquid glue.

Thanks for dropping by today, I hope that you have enjoyed this little sneak peak and I hope you have fun hopping along with us this month.
Blog Roll:

Happy Stampin'
Rick Adkins

Use the Host Code on any order of $50 (before taxes & shipping) or more during the month and receive a gift from me in May as a Thank You. If your order is $150 or more, please do not use the host code. You will forfeit your Stampin' Rewards if you do; and I want you to get those rewards.

If you place any size order with me during the month of May, you will receive the May Creative Stampers Tutorial Bundle from me as a little thank you. This month's tutorial bundle features Birthday Bonanza Suite of Products from the January-June Mini Catalog. The Creative Stampers Tutorial Bundle can either be earned for FREE with any size order or Can be purchased for $20 from me.