Hello and welcome to my blog! Well Crafty Peeps, I have been working on this post for two days now. I couldn't get a picture to upload to Photoshop Sunday night to edit them to get this post ready for yesterdays deadline. So, I spent all day yesterday moving files from my laptop to my external hard drive. Which by the way freed up the much needed space so that my laptop would work properly.
Now, since I have this thing working correctly I can share my project with you. So, lets get into today's project. I used the Harvest Meadow Suite to create a beautiful sympathy or get well card to share with you today. Which the sentiment I picked from the stamp set I think it could go either way. But, let me know in the comments if you think it can or not.
Hello and welcome to my blog; today is the first Friday of the month and it's the Blogging Friends Blog Hop. This month the hop theme was Fall Days Are Coming and I am sure that you will be inspired by what the others on the hop have created with some beautiful Fall themed products.
Hello and welcome to my blog; today I am going to share with you a really clean and simple card using the Seasonal Wreath Stamp Set from the 2019 Stampin' Up! Holiday Catalog. I created this card just with Stamps ink and paper and a little fussy cutting. I know how much you all love to fussy cut, but this card only has just a little. Here's a look at my card.
Tips & Tricks:
I started out my card with a thick piece of Whisper White cardstock cut at 4 1/4 x 11 scored at 5 1/2. and used one of my circle dies to lightly draw a circle on the card front with a pencil. I used the pencil lines as a place holder for the stamped images. Once I had the circle drawn in I came back with my eraser and went over it so that there wasn't a lot of graphite on the card stock. I didn't want the pencil marks to get trapped under the ink. At this point I could start my stamping.
I stamped the floral sprig around the circle letting each one touch just slightly. I stamped everything in Tuxedo Black ink. Once the ink dried I came back in again with my eraser and removed all the other pencil marks that I could with out damaging the ink. I then colored the image in with my Stampin' Blends. I used the following colors to do so; Pumpkin Pie Dark, Cherry Cobbler Dark, for the flowers and Mossy Meadow light and dark blends to color the leaves. I then stamped the bird on some scrap of thick whisper white cardstock and colored it with my Seaside Spray (for the chest) and Soft Suede light and dark for the body.
Once I had the bird colored I than fussy cut him out with my paper snips. Before placing the bird on my card I stamped the sentiment in Tuxedo Black ink in the center of the wreath. I left a little opening in the stamping so that I could put him in that spot. I popped him up on a Stampin' Dimensional for a little dimension to this clean and simple card.
To finish off the card I added some of the Holiday Rhinestones Basic Jewels to the center of the Pumpkin pie flowers and around the card. I used the Pumpkin Pie and Cherry Cobbler Rhinestones. The coloring on the card was super simple I just did basic coloring without any blending except on the bird. I hope that you like my little creation today, and that I have inspired you to create a Fall Wreath card using the Seasonal Wreath Stamp Set.
Happy Stampin'
Rick Adkins
If you live in the
US. I would love you to choose me as your demonstrator. If you
would like to purchase any of these products you can click on the Shop Now
Button or by clicking on any of the images below. Alternatively, you can
also contact me by email to place your order. Please be sure to use the
monthly host code and I’ll send a little something out to you the following
month to say Thank You!
November HOST CODE: QU2TJBJN
1.Spend any
amount with me this month and receive the Creative Stampers Tutorial
Bundle. Plus get a gift from me in December.
Please remember that if you use the host code you cannot use that
order towards my KCRP’s (Kinmon Crafty Reward Points) that would be double
dipping and is not allowed. For more information on KCRP’s click here.
Three
main reasons to Join!
1.You Get at least a 20% discount
on all your orders while you are a demo.
2.You get to join my fun Kinsmon
Crafters Team and Private Facebook Group.
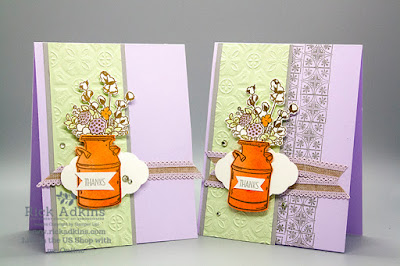
Hello and welcome to my blog; today I am going to share with you a Fall Card with a Slightly Different Color Theme. Yes there's tons of cards and projects out there with traditional Fall colors, the bright warm reds, the crisp oranges, and the golden yellows, but there are more colors out there that can be "Fall" colors. I created this card with Purple Posy, Grapefruit Grove, Smoky Slate, and Whisper White. These colors are just tones of the richer deeper colors, there are still present in the traditional Fall colors schemes, but just slightly different. You can actually find all these colors now in a types of different decor, cloths, and so much more. Here's a look at my card. Well, actually I am going to share the simple version of the card first then I will share the stepped up version.
Now here's the slightly stepped up version. I didn't go over the top with the additional elements but just enough to add to the overall look.
I had designed the original card for a friends team meeting that I went to last week. She has people volunteer to bring food or do a project, and I had volunteered to do one of the projects for this month. And I came up with the simplified version So after doing it I knew I wanted to step it up a little. So, then I did the stepped up version of the card and I am not sure which one I like the best.
Tips & Tricks:
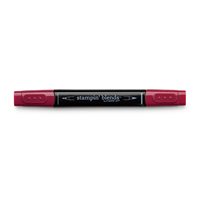
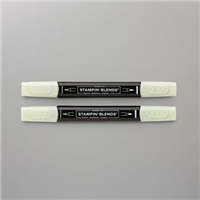
The first thing that I did was to prep my cardstock for the embossing. I did this with my embossing buddy to remove any oils from my cardstock. I knew that the heat embossing was going to be a big part of this card so there could be no stray powder anywhere. I then stamped my images on whisper white cardstock and one a scrap of Grapefruit Grove Cardstock with Versamark ink and covered them with my Gold Stampin' Embossing Powder. Next I heat set the images and I colored the flowers in with my Stampin' Write Markers (Purple Posy, Soft Sea Foam, Smoky Slate, and Grapefruit Grove). I took a sponge and on the Milk can I added a little sponging of Grapefruit Grove ink to the cardstock. Then I fussy cut them both out.
I ran my piece of Soft Sea Foam Cardstock through my die cutting machine with the Tin Tile 3d Embossing Folder and attached it to a piece of Smoky Slate cardstock. On my Purple Posy card base I stamped the little tile image from the Country Home stamp set in Smoky Slate ink going down the side of where I plan on putting the smoky slate and soft sea foam pieces. I did two rows of stamping. Once I had everything stamped I added the two pieces of cardstock. I then attached two pieces of the Purple Posy Scalloped Edge Ribbon with two small pieces of Tear & Tape to the front. Next I punched out a label from Whisper White Cardstock using the Pretty Label Punch and attached it with a couple dimensionals. Next I attached the flowers to the milk can using multipurpose liquid glue and a few dimensionals. My dimensionals where added where the flowers meet the mild can for added support and to the flowers. I attached the milk can to the label with a little liquid glue. This way the label and the focal element was the same height on the card.
I finished off the card by adding the sentiment stamped on a piece of whisper white in Smoky Slate ink and trimmed it out using my paper snips. I then attached it to the front of the milk can with a little adhesive. I added a few Rhinestone Basic Jewels to the front to finish the card. Here's a look at both of the cards side by side.
So no matter which way you create this card you can get a very pretty card to send out to people. Below you will find the Video tutorial for this card. If you have problems viewing this video in your email you can click here or on the above picture to go to the video. Sometimes the embedded video will not show in some emails.
I hope that you have enjoyed my little project today, and if you have not done so please make sure to subscribe to my blog and YouTube Channel. I have one more post for you tomorrow for my 12 Days of Fall celebration, so make sure you check back to see what cute little Fall project I have for you.
Happy Stampin'
Rick
If you live in
the US. I would love you to choose me as
your demonstrator. If you would like to
purchase any of these products you can click on the Shop Now Button or by
clicking on any of the images below. Alternatively,
you can also contact me by email to place your order. Please be sure to use the monthly host code
and I’ll send a little something out to you the following month to say Thank
You!
September HOST
CODE: VBBR3SCM
Spend any amount with me this month and receive the Creative
Stampers Tutorial Bundle featuring Fancy Fold or Interactive Projects. Plus get a gift from me in October.
Please
remember that if you use the host code you can not use that order towards my KCRP’s
(Kinmon Crafty Reward Points) that would be double dipping and is not
allowed. For more information on KCRP’s click here.
Three main
reasons to Join!
1.You
Get at least a 20% discount on all your orders while you are a demo.
2.You
get to join my fun Kinsmon Crafters Team and Private Facebook Group.


 Scalloped Linen Ribbon")

")


