Showing posts with label coloring. Show all posts

Monday, March 9, 2020

Flowering Foils Blooming Tag Thank You Card

Hello and welcome to my blog again today!  I have another card to share with you today featuring the Flowering Foils Speciality Designer Series Paper and Tags In Bloom Stamp Set Saleabration items.  I wanted to share with you the fun thank you card that i created for Kylie's International Blog Highlights today.  Please make sure you vote for my card.  Here's a look at my card.

Tips & Tricks: 

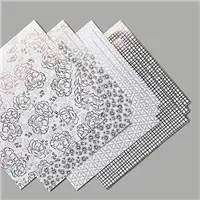
I started out my card by coloring the designer series paper.  I find that this paper colors in so many ways; I've used blends, stampin' write markers, and ink to color it.  Get this high-quality patterned paper featuring various floral designs and a checker design. This printed paper is great for card making, scrapbooking, and other paper crafts. The rose gold and silver foil designs will make any project shine. You can even color the white areas using your favorite coloring tools. Earn this fancy paper FREE March 3–March 31, 2020, during part two of our Sale-A-Bration promotion!  After coloring I cut mine down to 4 x 5 1/4.  For my metric friends you will cut your DSP to 14.2cm x 9.8cm.  

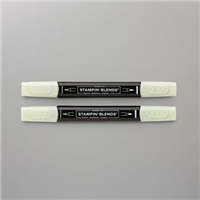
I then matted my dsp to a piece of Soft Seafoam Cardstock cut at 4 1/8 x 5 3/8 (metric will do 14.4 cm x 10 cm).  I then took some of the Silver Metallic Edge Ribbon and colored it with my Soft Seafoam Stampin' Blends.  I love to color white ribbon with my blends to get a custom ribbon that will match all my projects.  This is so easy to do since Stampin' Up! has perfect color coordination.  

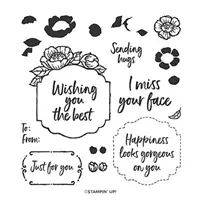
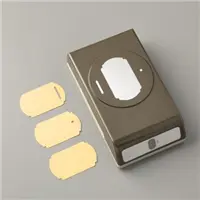
After attaching the ribbon and tie a bow with the extra I added it to my layer and secured the bow on with a Mini Glue Dot.  I stamped my outside sentiment on a scrap of Whisper White Cardstock using the Tags in Bloom Saleabration Stamp Set.  I stamped the outside image in Flirty Flamingo Ink and the sentiment in Soft Seafoam.  Then I used the Label Me Fancy Punch and punched it out.  I attached the sentiment with Stampin' Dimensionals.  

At this point it was time to attach everything to my Sahara Sand card base which was cut at 4 1/4 x 11.  For my metric friends you will do 10.5 cm x 29.8 cm and score in half.  


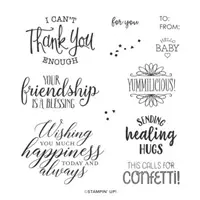
For the inside of my card I added a strip of the Flowering Foil Speciality Designer Series paper and my Thank you Sentiment from the So Sentimental Stamp Set (in Flirty Flamingo ink) onto a piece of Whisper White Cardstock cut at 4 x 5 1/4 (or 10 cm x 14.4 cm).  


Thanks for dropping by again today, I hope that you have enjoyed my card and that you will give it a try.  Make sure to pop over to Kylie's International Blog Highlights and check out all the wonderful projects that have been created for this month's Highlights.  Also don't forget to vote for your favorite and my card you can do so by clicking here.  If you need any of the supplies I have used today you can pick them up in my online store by clicking on the shopping list below.  Remember that the Flowering Foil Speciality Designer Series Paper and Tags in Bloom Stamp Set are Sale-A-Bration items and can only be earned FREE with qualifying orders until March 31, 2020 or while supplies last.  
Happy Stampin' 
Rick Adkins 


Use the March Host Code on any order of $50 (before taxes & shipping) or more during the month and receive a free gift from me in April as a Thank You.  If your order is $150 or more please don't use the host code.  You will forfeit your Stampin' Rewards if you do; and I want you to get those rewards.  


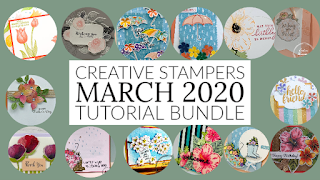
If you place any size order with me during the month of March you will receive the March Creative Stampers Tutorial Bundle from me as a little thank you.  This month's tutorial bundle features fourteen floral themed tutorials.  The Creative Stampers Tutorial Bundle can either be earned for FREE with any size order or Can be purchased for $20 from me.  

Stampin' Up! Shopping List: 


Monday, December 23, 2019

Spread Your Wings and Fly - Little Ladybug

Hello and welcome to my blog; today I am going to share with you a card using a very special stamp set.  I am going to share with you a card that I made with the Saleabration Host/Hostess Stamp Set called Little Ladybug.  These cute little ladybugs are eager to help you spread some love with fun handmade cards for birthdays, thank you, thinking of you, encouragement, and more!  This adorable stamp set can only be earned during Saleabration with a qualifying order, party, or workshop.  I will tell you more on that in a little while.  I based my card today on a card that's in the Saleabration brochure.  Here's a look at my card.

Tips & Tricks: 

I started my card by making my own designer series paper using my Old Olive Stampin' Blends and a piece of Whisper White cardstock.  Once I had the pattern I wanted; I just simply cut it into the size strips I needed.   After that I started working on stamping the flowers and the ladybug.  


I stamped the ladybug and the two flowers in Memento Tuxedo Black ink.  This allowed me to color each of them with my Stampin' Blends.  I did really simple coloring on both.  For the flowers I just colored the centers (Mango Melody) and the stems and leaves were done in Old Olive.  And, for the lady bug I colored the wings (Poppy Parade), and a little coloring on the body (Petal Pink).  I even colored in the dots on the wings because they are not stamped all the way with the image.  The sentiment was stamped in Versamark ink and sprinkled with White Stampin' Emboss Powder and heat set onto a piece of Poppy Parade Cardstock that was made into a banner.  

How to Get this set: 

To get the adorable Little Ladybug Host Stamp Set FREE!  Yes, you can get it for free; when you host a party or place an order totaling $300 or more during our Sale-A-Bration promotion (January 3–March 31, 2020).    Once you hit the threshold for the order you will be able to add it to your order along with your Stampin' Reward items.

Sizes & Dimensions: 

  • Crumb Cake Cardstock: 4 1/4 x 11 scored at 5 1/2
  • Whisper White Cardstock: 4 x 5 1/4 (inside) 
  • Whisper White Thick Cardstock:  4 x 5 1/4 (for Lady Bug and Flowers) 2 1/4 x 5 1/2 (Old Olive Striped Piece) 
  • Poppy Parade Cardstock: Scrap for banner
When I saw this stamp set in the catalog I knew I had to have it because it was just so darn cute.  I hope that you enjoy this card idea as much as I did making it.  I will see you again tomorrow with another project, and tutorial.
Happy Stampin' 
Rick Adkins 


If you live in the US.  I would love you to choose me as your demonstrator.  If you would like to purchase any of these products you can click on the Shop Now Button or by clicking on any of the images below.  Alternatively, you can also contact me by email to place your order.  Please be sure to use the monthly host code and I’ll send a little something out to you the following month to say Thank You!  

December HOST CODE:  CEUXJX6R
  1. Spend any amount with me this month and receive the Creative Stampers Tutorial Bundle.  Plus get a gift from me in January.
Please remember that if you use the host code you cannot use that order towards my KCRP’s (Kinmon Crafty Reward Points) that would be double dipping and is not allowed.  For more information on KCRP’s click here.  


Three main reasons to Join!  
1.     You Get at least a 20% discount on all your orders while you are a demo.   
2.     You get to join my fun Kinsmon Crafters Team and Private Facebook Group.
3.     Access to directions to all my online classes 


  Stampin Up! Shopping List:

Monday, October 28, 2019

Stampers Showcase October Blog Hop: It's Fall Y'all

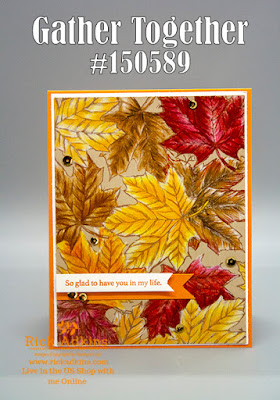
Hello and welcome to my second post today; I am sharing a project for the Stampers Showcase October Blog Hop.  The theme this month is It's Fall Y'all.  I have created a fun Fall themed card using the Gather together stamp set.  Here's a look at my card.
I started may card by stamping the large leaf image from the Gather Together Stamp set over and over masking each time on a piece of Crumb Cake cardstock.  Once I had all the leaves stamped felling up the entire piece of cardstock, I started coloring each of them using my Polychromos Colored Pencils.  I think that color pencils look better on darker color cardstocks.
I started each leaf the same way.  I started coloring with my white pencil and then added in other colors.  I always start out with a light hand and build up layer by layer and eventually getting heavy with the pigment of the pencil to fill in the tooth of the paper.  By starting out with a very light hand I can build up multiple layers overlapping the colors letting the colors underneath show through the layers on top.  This is called glazing.  Once I start pressing firmer on the pencils this starts to blend the colors.  You can also use a blending pencil to do this once you have all your colors laid down.  Because with the blending pencil it puts a coating on top of the pencils and doesn't allow for more pigment to be added.
With all the leaves colored I added the crumb cake piece to a piece of whisper white cardstock that was cut at 5 3/8 x 4 1/8.  I then added the focal image to my card base made out of Pumpkin Pie cardstock.  I added a pumpkin pie banner and a sentiment banner to the front of the card.  I added some gold sequins to finish off my card.

Thanks for dropping by today, you can click on the next button above to go to the next blog on the list.

Happy Stampin' 
Rick Adkins 

If you live in the US.  I would love you to choose me as your demonstrator.  If you would like to purchase any of these products you can click on the Shop Now Button or by clicking on any of the images below.  Alternatively, you can also contact me by email to place your order.  Please be sure to use the monthly host code and I’ll send a little something out to you the following month to say Thank You!  

November HOST CODE:  QU2TJBJN
1.     Spend any amount with me this month and receive the Creative Stampers Tutorial Bundle.  Plus get a gift from me in December.
Please remember that if you use the host code you cannot use that order towards my KCRP’s (Kinmon Crafty Reward Points) that would be double dipping and is not allowed.  For more information on KCRP’s click here.  


Three main reasons to Join!  
1.     You Get at least a 20% discount on all your orders while you are a demo.   
2.     You get to join my fun Kinsmon Crafters Team and Private Facebook Group.
3.     Access to directions to all my online classes 


Product List

Template Designed by creativeworkerbee