Hello and welcome to my blog; today I have a fun rainbow background card for you. I did a little heat embossing for a rainbow embossed resist background along with a little Stampin' Blend coloring. But, the blend coloring wasn't with color I created a black and white image for the focal point of my card. I wanted it to pop against the rainbow background. Here's a look at today's card.

Tips & Tricks:
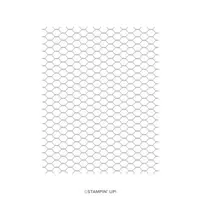
I started out by taking a 4 x 5 1/4 piece of Whisper White Thick Cardstock and covered it with my Embossing Buddy (which is a anti static powder tool). Next I stamped the All Wired Up Background Stamp in Versamark ink using the Stamparatus. Once I had the stamped I then added White Stampin' Emboss Powder all over the entire image. I then heat set it using my heat tool. Once I had the entire image heat set I let it cool completely before moving on to the step.

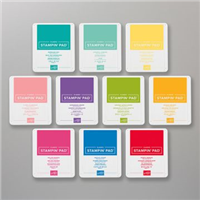
I then took post it tape and my heat embossed cardstock and taped it down to my board. I taped from one corner to the other corner Once I had two pieces of post it tape ran from the four corners I came back and started the ink blending process. I started out with Poppy Parade Ink on one side of the triangle and ink blended to the middle letting it get lighter as I went. Next I came in from the other side of the triangle and came in with Mango Melody and ink blended toward the center in the same manner. I then moved the post it tape around to cover the triangle I just created to protect the color I just put down. And, repeated the process each time with two new colors working around until I got all the way around. My colors were as followed starting from the first triangle; Poppy Parade & Mango Melody, Daffodil Delight & Granny Apple Green, Coastal Cabana & Pacific Point, Gorgeous Grape & Melon Mambo.

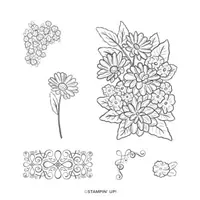
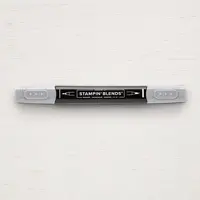
Next I stamped the large flower bouquet from the Ornate Styles Stamp Set in Tuxedo Black ink using my Stamparatus. I let the ink dry for a minute before I started the coloring process. I used the following grays and black blends to color the image. I used Gray Granite Light & Dark, Smoky Slate Light & Dark, and Basic Black Light Stampin' Blends to color the image. I added in the warmer gray granite to add just a little warmth into the image compared to just using the color smoky slate and basic black. I then cut the image out using my Paper Snips and a exacto knife for the inside part of the flowers.

I got the sentiment from the Seriously the Best Stamp Set which matches the Seriously the Best Kit from the January-June Mini Catalog. I stamped the large thanks in versamark ink onto Basic Black Cardstock. I added white stampin' emboss powder and heat set it. Once cooled I used my paper snips and created a shadow around the word. I then added some of the Basic Black Shimmery Ribbon to the card front, and placed the black and white bouquet over the ribbon with Stampin' Dimensionals. I then added the thanks that I cut out over the bouquet with stampin' dimensionals.

I finished off the card by adding a few of the iridescent sequins from the Gingham Gala Adhesive Backed Sequins. I then added the card front onto a Basic Black 4 1/8 x 5 3/8 basic black mat before adding it to my 5 1/2 x 8 1/2 Thick Whisper White card base. Thanks for dropping by today I hope that you have a wonderful day.

Happy Stampin'
Rick Adkins
If you live in the US. I would love you to choose me as your demonstrator. If you would like to purchase any of these products you can click on the Shop Now Button or by clicking on any of the images below. Alternatively, you can also contact me by email to place your order. Please be sure to use the monthly host code and I’ll send a little something out to you the following month to say Thank You!

Use the April Host Code on any order of $50 (before taxes & shipping) or more during the month and receive a gift from me in May as a Thank You. If your order is $150 or more, please don't use the host code. You will forfeit your Stampin' Rewards if you do; and I want you to get those rewards.

If you place any size order with me during the month of April, you will receive the April Creative Stampers Tutorial Bundle from me as a little thank you. This month's tutorial bundle features eleven tutorials that use the outgoing 2018-2020 In Colors. The Creative Stampers Tutorial Bundle can either be earned for FREE with any size order or Can be purchased for $20 from me.

Order $50 (before shipping and taxes) of products from the Ornate Garden Suite of Products in my Online Store in April using the Host Code: ZPBUDHR7 and I will send you’re the Ornate Garden Mega Tutorial Bundle for FREE as a thank you gift. That’s 90 tutorials featuring products from the Ornate Garden Suite (a $21 value) free for purchasing products from the Ornate Garden Suite from me this month free.

Don’t want to order but still would like to get the Ornate Garden Mega Tutorial Bundle featuring 90 projects with both metric and Imperial measurements for each project! You can purchase it from me for $21.00 US any where in the world in my online store by clicking here.