Hello and welcome to my blog today, and the November Blogging Friends Blog Hop! This month our theme is Celebrate with Some Christmas Cheer. When I came up with this month's theme I had something different in mind than what I came up with for this month's project. I didn't know at the time I came up with the theme that Stampin' Up! would be releasing a limited time suite that was just perfect for this theme. But, they says things happen for a reason and this was so true with this theme and the limited time Christmastime is Here Suite of products that went live in my online store today. Here's a look at my projects.
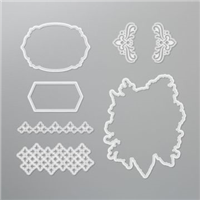
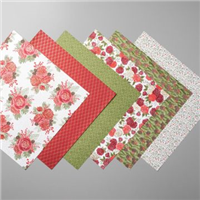
Yes, I did say projects; I really love this suite of products and created an entire gift set with the products from this suite. I started out by creating a card using the Christmas Rose Stamp Sets, matching dies, Christmastime is Here Designer Series Paper and other products in this suite.
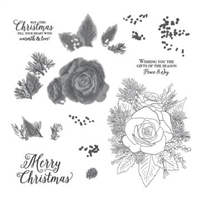
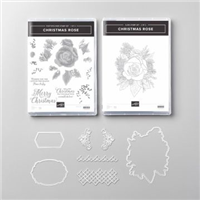
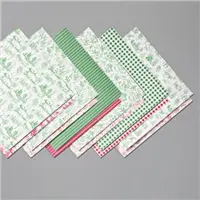
The Christmas Rose Stamp set is a dual configuration set; meaning one stamp set is clear mount red rubber and the other is Photopolymer. The Red rubber cling stamp is the outline of the rose bouquet. The photopolymer set is the layering set to fill in your outlined images. This set works best with the stamparatus, so that you can get perfect placement with your stamped layers. I used a piece of the designer series paper in the background of my card.
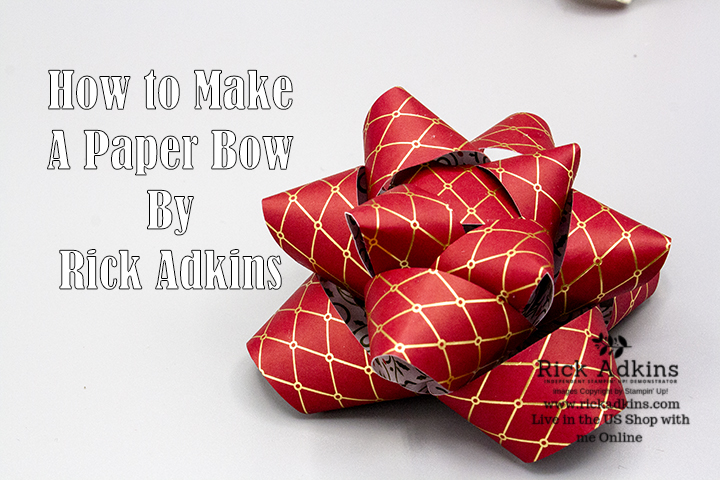
Next for the gift set I made a bow using the designer series paper. I used the bow to decorate my little gift bag. I also created a matching tag to go along with the bow and gift bag. I love the look of brown paper mixed with pretty paper at Christmas Time. I did a video on how to create paper bows a few weeks ago I will share that with you as well so that you can make your own.
Paper Bow Video:
If you are viewing my post by email today you can click here to view the bow making tutorial.
To me there's not a better way to celebrate Christmas Cheer than with a gift set. Because after all isn't this truly a time to share the joy of giving during the holiday season, so why not have a few gift sets made and ready to go. Plus with the limited time Christmastime is Here Suite (available while supplies last) you will be totally ready to go during the holiday season. Thanks for dropping by I hope that you have a wonderful day.
If you are viewing this post on my wordpress site you will need to click here to view the blog roll.
Blog Roll:
Happy Stampin'
Rick Adkins
If you live in the
US. I would love you to choose me as your demonstrator. If you
would like to purchase any of these products you can click on the Shop Now
Button or by clicking on any of the images below. Alternatively, you can
also contact me by email to place your order. Please be sure to use the
monthly host code and I’ll send a little something out to you the following
month to say Thank You!
November HOST CODE: QU2TJBJN
1.Spend any
amount with me this month and receive the Creative Stampers Tutorial
Bundle. Plus get a gift from me in December.
Please remember that if you use the host code you cannot use that
order towards my KCRP’s (Kinmon Crafty Reward Points) that would be double
dipping and is not allowed. For more information on KCRP’s click here.
Three
main reasons to Join!
1.You Get at least a 20% discount
on all your orders while you are a demo.
2.You get to join my fun Kinsmon
Crafters Team and Private Facebook Group.
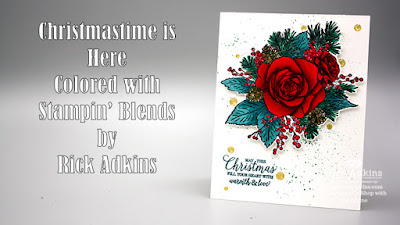
Hello and welcome to my blog; today I am going to share with you a card I made with the upcoming Christmastime Is Here Suite of products that will release for a limited time in November. The stamp set in this suite is a duo configuration stamp set; meaning you get two stamp sets one is a Cling Mount set and one is a Photopolymer set. With this configuration you get both styles. The cling stamp is just the outline image and the photopolymer set is designed to layer the colors into the outline. I just stamped the outline image and colored it with my stampin' blends. Here's a look at my card.
I love this stamp set and love the Christmas feel. As I mentioned this is from a Limited Time Release coming in November. In the suite that is coming there's the two stamp sets, matching dies, enamel dots, ribbon and designer series paper. I will share another post next week with all the products from this suite. I stamped the outline image onto a piece of Thick Whisper White cardstock using my Stamparatus and some Tuxedo Black Ink. I did this because it's a larger stamp and I wanted to be able to stamp it twice if I didn't get a good impression the first time.
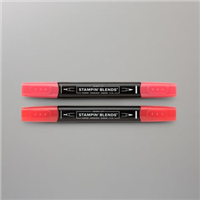
Once I got it stamped out I used my Stampin' Blends to color the image. I colored the rose first using the light and dark Cherry Cobbler Combo Pack. I colored the entire rose image with Cherry Cobbler Light first and put down a base color. I then came back with my dark to add my shadows, and then went back in with my light to blend it out. I did this on each petal, one at a time.
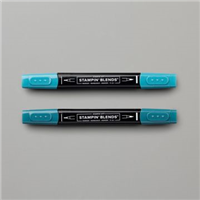
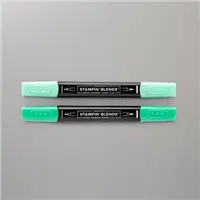
Next I worked on the leaves and colored them with Pretty Peacock light and dark blends. This time I did them a little different. I started with the dark and then came back in with the light. With both I flicked in the colors and let the ink blend together. Next I worked on the pine cones. They were colored with Crumb Cake and Soft Suede stampin blends. I then colored the pine branches with Shaded Spruce, put both light and dark in not really blending, but picking certain needles to be each color. This gives the illusion of light and dark needles. I wanted a different shade berry so I used Poppy Parade to color them.
To embellish my card I did some ink platter on my Whisper White Thick panel with my Shaded Spruce Blends. And let that dry and then added some of the gold enamel dots in the limited time release suite, and popped the rose bundle up on dimensionals.
Video Tutorial:
If you are viewing this post by email you will have to click here or click on the image below to view the video.
Thanks for dropping by by today, I hope that you have enjoyed the little walk through of my card.
Remember that the products in the Christmastime is Here Suite will release on November 1, 2019. And they are only while supplies last. I will be back again tomorrow with a new project for you see you then.
Happy Stampin'
Rick Adkins
If you live in the
US. I would love you to choose me as your demonstrator. If you
would like to purchase any of these products you can click on the Shop Now
Button or by clicking on any of the images below. Alternatively, you can
also contact me by email to place your order. Please be sure to use the
monthly host code and I’ll send a little something out to you the following
month to say Thank You!
October HOST CODE: SQ2WWJZN
1.Spend any
amount with me this month and receive the Creative Stampers Tutorial Bundle
featuring Fall & Halloween Projects. Plus get a gift from me in
November.
Please remember that if you use the host code you cannot use that
order towards my KCRP’s (Kinmon Crafty Reward Points) that would be double
dipping and is not allowed. For more information on KCRP’s click here.
Three
main reasons to Join!
1.You Get at least a 20% discount
on all your orders while you are a demo.
2.You get to join my fun Kinsmon
Crafters Team and Private Facebook Group.
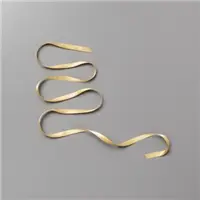
Hello and welcome to my blog; today I am going to share with you my Facebook Live Mini class from last night where I taught everyone how to make Paper Bows from your Designer Series Paper. Yes I said Paper Bows! Paper Bows are a way to dress up your packaging with your own flare and creativity. Here's a look at one of the bows that I made.
Paper bows can be a super cute thing to create for your gift giving needs. You can spend a lot of money on bows at the Holidays or for just gift giving in general. Plus when you buy them you have to store them. Which means more than likely they are going to be crushed. Sad face. Come on I know you have went to your gift wrapping stash for a bow only to pull it out and it was as flat as a pancake. I have! Well by making your own you do two things: One you don't have to deal with the dreaded crushed beyond repair bow, and two you can use up some of that designer series paper you are hording. By making your own bows think about all the endless possibilities you have. No more wondering around the gift wrapping aisle in the store, no more dragging your kids through the store with them begging for every little thing, and best of all no more oh it will do situations.
Tips & Tricks:
So you may be wondering how and the world can I do that. Well, it's actually really easy. A lot easier then you would think it would be. It was to me once I figured it out. I look around for awhile trying to find the instructions and I did find some but they were all in international measurements. Well, since I am in the United States and don't know a lot about centimeters I had to figure out measurements for me. I will share those with you in just a little bit.
One of the best things about making your own bows is you get to customize it to your needs. Here you can see two bows I made. One is smaller using 6 x 6 designer series paper and the other is using 12 x 12 paper. But you can see that depending on what your needs are you can make it to coordinate with your gifts. Or you can even customize it your a color combination you want to use.
So to make a paper bow, and this is one of the hardest things you will have to do, is to pick what designer series paper you want to use. Okay, there I've said it! This is the must complicated part about the whole process. And, I will tell you that the first time you make one it may not turn out the way you want so pick something to practice with you don't love. But, after you do it a couple times they get better and you end up getting faster at making them.
Step 1. You will need to cut some strips of designer series paper. For my example here I am using 12 x 12 Designer Series Paper. You will need 4 strips that are 1" x 12", 4 strips that are 1" x 11" and two strips that are 1" x 10" and one that's 1" x 7" or so. The first thing you do after cutting them all out is to fold them in half. Next you are going to use Multipurpose Liquid Glue add a little around the center fold line. But, before we get there let me mention that whichever side you want facing out in the end result needs to be facing down. After you have your glue in place your going to turn the paper to make a loop. You will see what I mean in the video tutorial at the end. Then your going to do the same thing on the other side. You will do this to all the pieces except the smallest one.
Step 2. You will end up with them looking like this. You want the paper to look like little figure eights. Make sure you let the glue dry completely. You want to use a strong liquid glue because you will have to move them around into position. Snail doesn't hold up as well to the way you have to move them paper around.
Step 3. Take the small piece and make a simple loop. You can see I used locking tweezers to hold it in place while it dries.
Step 4. You are going to simple start gluing all the figure eights together. Starting with the largest ones first placing them at an angle on top of each other and adding glue to the center of the one below the one you want to attach on top. Then you're going to move to the medium size loops and repeat the process until you're ready for the small little loop. The small loop will take some moving around and holding to secure inside. By the time you get there the bow is very tight and take s a little moving to get it into position.
And that is really all it is. I do recommend that you have something near by to wipe your fingers on every so often because you are going to get sticky.
Video Tutorial:
If you are viewing my post by email you may not see the embedded video. You may have have click here or click on the image below to watch the video. Some email servers will not show the embedded videos.
Thanks for dropping by today, I hope that you have enjoyed my little project. I also hope that you will give this a try. The Christmastime is Here Suite of products will be available starting November 1, 2019 unless you are a demonstrator. So if you have been thinking about joining my team and you love to get your hands on new products early now's the time to sign up. Also remember that if you use 6 x 6 designer series paper you have to double the strips you need.
Happy Stampin'
Rick Adkins
If you live in
the US. I would love you to choose me as
your demonstrator. If you would like to
purchase any of these products you can click on the Shop Now Button or by
clicking on any of the images below. Alternatively,
you can also contact me by email to place your order. Please be sure to use the monthly host code
and I’ll send a little something out to you the following month to say Thank
You!
October HOST
CODE: SQ2WWJZN
Spend any amount with me this month and receive the Creative
Stampers Tutorial Bundle featuring Fall & Halloween Projects. Plus get a gift from me in November.
Please
remember that if you use the host code you cannot use that order towards my KCRP’s
(Kinmon Crafty Reward Points) that would be double dipping and is not
allowed. For more information on KCRP’s click here.
Three main
reasons to Join!
1.You
Get at least a 20% discount on all your orders while you are a demo.
2.You
get to join my fun Kinsmon Crafters Team and Private Facebook Group.
Don't forget
about my fundraising effort! When you purchase the Nature's Beauty Stamp
Set using the Host Code above from September 28, 2019 until October 10, 2019, I
will donating 20% off all the sales from that set to NAMI. Which is the
National Alliance for Mental Illness. As my gift to you; you will get two
VIP Card Kits to go along with the Stamp Set FREE. My goal is
$1500! Help me help others in need. Click
here to purchase
this set.