Showing posts with label bird. Show all posts

Monday, February 14, 2022

You Have my Love & Support - Friendly Hello Bundle

Hello and welcome to my blog; today is Valentine's Day and I hope you have a great one, I could do like everyone else and share a tone of Valentine's cards of projects with you but I wanted to share a card that you could send all month long or even all year long to show someone that you love and support them.  Here's a look at my card.  

Today's card uses the Friendly Hello Bundle from Stampin' Up! so you can show someone you love & support them.

Wednesday, June 9, 2021

Triple Accordion Card - Beauty of Friendship and Bird and Branches Stamp Sets

Hello and welcome to my blog; today I am going to share with you a fun little card using some new and returning products from the 2021-2022 Stampin' Up! Annual Catalog.  And it's also a fun fold card.  So, you know it has to be pretty easy if I did it.  Here's a look at my project.  

Check out my Triple Accordion Fun Fold Card using the Birds & Branches & Beauty of Friendship Stamp Sets Click here to learn more.

For my project today I paired the Beauty of the Earth Designer Series Paper with the Birds & Branches Stamp Set.  

Saturday, March 28, 2020

Thanks for Being You - Free As A Bird - Stampin' Up! Simple Stamping Saturday

Hello and welcome to my blog; today I have another Simple Stamping Card for you.  Today's card is a simple one layer card.  I used the Free As A Bird Stamp Set from the 2019 Annual Catalog, along with some a little simple coloring.  Simple stamping is all about going back to the basics for people that may not have a lot of experience stamping or that are just learning.  Here's a look at today's Simple Stamping Card.


I started out by taking a 4 1/4 x 11 piece of Thick Whisper White Cardstock and stamping the image of the very cute little birds on the branch in Soft Suede Ink and colored them very loosely with a few stampin' blends.  I used the following colors (all the dark blends) no blending for some very simple coloring; Calypso Coral, Daffodil Delight, Pool Party, and Petal Pink.  I colored in the branch with the Soft Suede Dark Blend, and the leaves with Mossy Meadow.  The flowers were done with Calypso Coral. 


I then stamped the smaller branch from the set with Mossy Meadow Ink at the top along with the small bloom.  I added a few of the small flower image from the stamp set to fill in some areas and add a little extra color to the card with Calypso Coral Classic Ink.  I then added just a little more color to the leaves at the top with my Mossy Meadow blends.  Just roughly coloring them in and not adding a ton of color to not over saturate the cardstock.


To finish off my simple card I added the sentiment in Mossy Meadow above the branch with the birds perched on it on the left-hand side.  Simple stamping cards would be great to create a bunch right now during the Covid-19 pandemic to give to people that are out working.  They would be great to send to send to first responders, your mail person, people working at the grocery store or someone you may encounter or know that may need a little pick me up.
Happy Stampin' 
Rick Adkins 

If you live in the US.  I would love you to choose me as your demonstrator.  If you would like to purchase any of these products you can click on the Shop Now Button or by clicking on any of the images below.  Alternatively, you can also contact me by email to place your order.  Please be sure to use the monthly host code and I’ll send a little something out to you the following month to say Thank You!


Use the March Host Code on any order of $50 (before taxes & shipping) or more during the month and receive a gift from me in April as a Thank You.  If your order is $150 or more, please don't use the host code.  You will forfeit your Stampin' Rewards if you do; and I want you to get those rewards.

If you place any size order with me during the month of March, you will receive the March Creative Stampers Tutorial Bundle from me as a little thank you.  This month's tutorial bundle features fourteen floral themed tutorials.  The Creative Stampers Tutorial Bundle can either be earned for FREE with any size order or Can be purchased for $20 from me.

Stampin' Up! Shopping List: 


Monday, February 24, 2020

Wishing You Much Happiness today and Always - So Sentimental - Bird Ballad Notecard

Hello and welcome to my blog; today I am going to share with you a super cute and easy notecard using products from the January-June Mini and the 2019 Stampin' Up! Annual Catalog  For my project today I created a note card to share with someone that maybe getting married, or maybe they are going through something, or maybe they just need a little encouragement.  These little notecards are perfect for all those occasions you may run into.  I picked one of my favorite Sentiment sets and one of my favorite Designer series papers for this project.  Here's a look at the notecard.


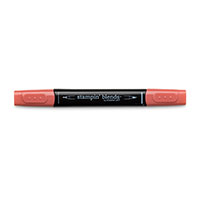
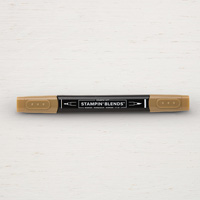
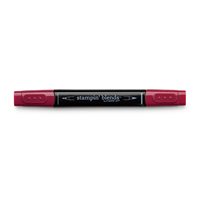
I used the Bird Ballad designer series paper and the So Sentimental Bundle for my project today.  I love the fun spring feel of the designer series paper.  I am really feeling the spring-fever right now, as you may have noticed from my projects as of late.  And, the Bird Ballad Designer series paper helps kind of curves the I am Ready for Spring feeling I've got going on.  I wanted to showcase the big sentiment from the So Sentimental Stamp Set so I keep the card really simple in design.  Just a little designer series paper and a few colored rhinestones.  Which by the way I colored with my Dark Daffodil Delight Stampin' Blend.


My note card was cut from a piece of thick whisper white cardstock which measures 4" x 10 1/2" and I scored it at 5 1/4" to make the top folding note card.  I actually did this by accident I thought was cutting down two pieces of whisper white for another project but learned after I had it cut that it was a Thick Whisper White Card base; I think it all worked out because I adore the card that it made.  The Bird Ballad Designer Series Paper was cut to fit the entire front of the card.  I used another piece that I had cut down for the center of the card to add a little color interest plus to help ground the sentiment.  I also added a little strip to the inside of the card to make everything tie in.
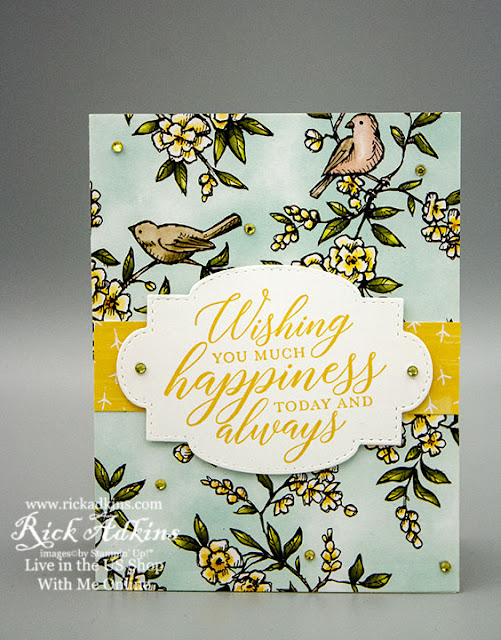
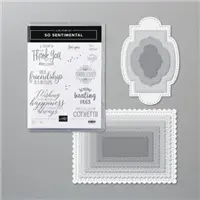
After all the designer series paper was attached I stamped my sentiment onto a scrap of the thick whisper white cardstock in Daffodil Delight ink and used the matching dies from the bundle to cut it out.  The So Sentimental Bundle includes the So Sentimental Stamp Set and the Stitched So Sweetly Dies.

SO SENTIMENTAL CLING STAMP SET

Create tags, labels, and more with the phrases in the So Sentimental Stamp Set. These greetings are suitable for so many occasions—celebrating birthdays, welcoming new babies, saying “thank you.”
* 11 cling stamps
* Suggested clear blocks (sold separately): a, b, c, d


STITCHED SO SWEETLY DIES

Create frames and tags of various shapes and sizes using the Stitched So Sweetly Dies. Pair the dies with the coordinating So Sentimental Stamp Set to quickly cut out sentiments for your handmade cards, tags, and more. You’ll love the versatility of these dies and the all-occasion sentiments from the stamp set.

Thanks for dropping by today, I hope that I have inspired you to power thorough your mess ups and try to create something beautiful with them.  Sometimes it's just a matter at looking at things just a little differently to get over that hurdle.  If you need any of the supplies that I used today you can pick them up in my online store 24/7 by clicking on the items in the shopping list below.

Stampin' Up! Shopping List: 


Happy Stampin' 
Rick Adkins 

Friday, November 8, 2019

Life is Better With You - Seasonal Wreath Stampin' Up!

Hello and welcome to my blog; today I am going to share with you a really clean and simple card using the Seasonal Wreath Stamp Set from the 2019 Stampin' Up! Holiday Catalog.  I created this card just with Stamps ink and paper and a little fussy cutting.  I know how much you all love to fussy cut, but this card only has just a little.  Here's a look at my card.  

Tips & Tricks: 

I started out my card with a thick piece of Whisper White cardstock cut at 4 1/4 x 11 scored at 5 1/2.  and used one of my circle dies to lightly draw a circle on the card front with a pencil.  I used the pencil lines as a place holder for the stamped images.  Once I had the circle drawn in I came back with my eraser and went over it so that there wasn't a lot of graphite on the card stock.  I didn't want the pencil marks to get trapped under the ink.  At this point I could start my stamping.  
 I stamped the floral sprig around the circle letting each one touch just slightly.  I stamped everything in Tuxedo Black ink.  Once the ink dried I came back in again with my eraser and removed all the other pencil marks that I could with out damaging the ink.  I then colored the image in with my Stampin' Blends.  I used the following colors to do so; Pumpkin Pie Dark, Cherry Cobbler Dark, for the flowers and Mossy Meadow light and dark blends to color the leaves.  I then stamped the bird on some scrap of thick whisper white cardstock and colored it with my Seaside Spray (for the chest) and Soft Suede light and dark for the body.  
Once I had the bird colored I than fussy cut him out with my paper snips.  Before placing the bird on my card I stamped the sentiment in Tuxedo Black ink in the center of the wreath.  I left a little opening in the stamping so that I could put him in that spot.  I popped him up on a Stampin' Dimensional for a little dimension to this clean and simple card.  
To finish off the card I added some of the Holiday Rhinestones Basic Jewels to the center of the Pumpkin pie flowers and around the card.  I used the Pumpkin Pie and Cherry Cobbler Rhinestones.  The coloring on the card was super simple I just did basic coloring without any blending except on the bird.  I hope that you like my little creation today, and that I have inspired you to create a Fall Wreath card using the Seasonal Wreath Stamp Set.  
Happy Stampin' 
Rick Adkins 


If you live in the US.  I would love you to choose me as your demonstrator.  If you would like to purchase any of these products you can click on the Shop Now Button or by clicking on any of the images below.  Alternatively, you can also contact me by email to place your order.  Please be sure to use the monthly host code and I’ll send a little something out to you the following month to say Thank You!  


November HOST CODE:  QU2TJBJN
1.     Spend any amount with me this month and receive the Creative Stampers Tutorial Bundle.  Plus get a gift from me in December.
Please remember that if you use the host code you cannot use that order towards my KCRP’s (Kinmon Crafty Reward Points) that would be double dipping and is not allowed.  For more information on KCRP’s click here.  


Three main reasons to Join!  
1.     You Get at least a 20% discount on all your orders while you are a demo.   
2.     You get to join my fun Kinsmon Crafters Team and Private Facebook Group.
3.     Access to directions to all my online classes 

Stampin' Up! Shopping List: 


Template Designed by creativeworkerbee