Hello and welcome to my blog; today I am going to share with you a card that I made using the Celebrate Sunflowers Stamp Set and my Stampin' Blends. I wanted to create a card to represent the sunflowers that are growing in my yard. Must of you know that sunflowers grow nice and tall on a large stalk. So I wanted to create a card like that. I pulled out my Celebrate Sunflower stamp set and my Stampin' Blends and got to work. Here's the photo inspiration for my card.

Tips & Tricks:
I started my card by taking a piece of Thick Very Vanilla Cardstock cut at 5 1/2" x 4 1/4" and stamped the large sunflower from the Celebrate Sunflowers Stamp Set in Tuxedo Black Ink. Next I made a couple masks with Post It Notes that I wanted to use so that I could do a little layering in my scene. I then masked the large sunflower and stamped the leaves behind. And stamped the small one in the stamp set and repeated the process. Once I had it all completely stamped I removed the masks, and drew in my stem and connected the leaves with a alcohol ink friendly pen. There are a lot on the market so just find one that works best for you. But, make sure you test them with your alcohol markers.

Once I had everything connected and stamped it was time to start the fun part; the coloring! I started out by laying down a underpainting on the entire piece with my Smoky Slate Stampin' Blends. The underpainting allows me to use fewer colors to achieve the shadows and highlights. Plus it makes for a much richer tonal value. Once that was complete and the ink was dry I could start layering in my colors.

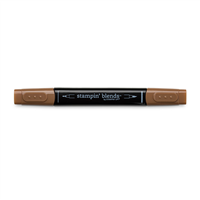
I colored each sunflower center with Crumb Cake and my Cinnamon Cider Stampin' Blends. I started with the lighter color and worked my way to the darker. Then I repeated the process in reverse to be able to flick in more color and value. I repeated the same coloring process with each petal working my way around the flower. For each petal I used Cinnamon Cider and Mango Melody Stampin' Blends.

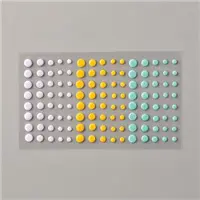
Next it was time to move on to the stem and leaves. I colored each one with Mossy Meadow, and Old Olive and this time I started in the shadow areas and worked out to where I wanted the light to hit. Once all my flowers, stems and leaves were colored and I was happy with the way they looked I came in with Highland Heather, Purple Posy, and my Color Lifter to create a touch of atmospheric color halo around the focal image. I then stamped the sentiment in Highland Heather Ink on the bottom right and added a few of the Purple Posy enamel dots from the Playing with Patterns Enamel Dots. I then attached the card front to my Very Vanilla Thick card base that was cut at 4 1/4" x 11" scored and folded at 5 1/2".

Once I had everything attached to my card base I decided that the card needed just a little something extra to give it a little more of a wow factor once it was opened by the recipient. So, I took my Wink-of-Stella and added glitter over all the flowers, leaves, and stems. You can not see it in the pictures but it adds so much. It's amazing how just a little thing will change the look of your projects. So, don't count out the little extra touches.
Project Recipe:
I have created a little graphic for you to pin to your Pinterest board just in case you want to recreate this card to make it easy for you to remember the key elements. If you want to check out my other project recipes you can do so on my by clicking here.

Thanks for dropping by today, I hope you have a wonderful day and if you need any of these supplies you can pick them up in my online store by clicking on the items in the Stampin' Up! shopping List below. Have a wonderful day.

Happy Stampin'
Rick Adkins

Use the Host Code on any order of $35 (before taxes & shipping) or more by August 31th and get invited to my September Monthly Card Class as a Thank You. ($25 value) If your order is $150 or more, please do not use the host code. You will forfeit your Stampin' Rewards if you do; and I want you to get those rewards.
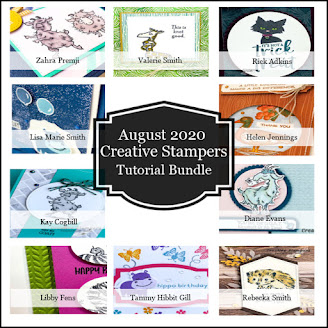
If you place any size order with me during the month of August, you will receive the August Creative Stampers Tutorial Bundle from me as a little thank you. This month's tutorial bundle has ten project tutorials that feature our favorite new Cozy Critters products from one of the new Stampin’ Up! Catalogs. The Creative Stampers Tutorial Bundle can either be earned for FREE with any size order or Can be purchased for $22 from me.

I am very close to earning the 2021 Stampin' Up! Incentive Trip to Maui and your orders can help me get there. I am running a few special promotions until the end of September to not only help me earn this trip but to help you save a little cash as well. I am kicking off my Maui of Bust Promotions with a Mega Holiday Embellishment Product Share. The deadline to take part in the Mega Holiday Embellishment Product Share is August 21, 2020. You can check out what's all included in this Mega Holiday Embellishment Product Share by clicking here. I will have a new smaller promotion each week that runs from Tuesday of one week till Monday of the following week. So be watching for those as well. Some promotions will only last a couple days.

With each $1000 I earn I will be cutting off a chain from my Maui or Bust Countdown Chain.
Rick Adkins

Use the Host Code on any order of $35 (before taxes & shipping) or more by August 31th and get invited to my September Monthly Card Class as a Thank You. ($25 value) If your order is $150 or more, please do not use the host code. You will forfeit your Stampin' Rewards if you do; and I want you to get those rewards.

If you place any size order with me during the month of August, you will receive the August Creative Stampers Tutorial Bundle from me as a little thank you. This month's tutorial bundle has ten project tutorials that feature our favorite new Cozy Critters products from one of the new Stampin’ Up! Catalogs. The Creative Stampers Tutorial Bundle can either be earned for FREE with any size order or Can be purchased for $22 from me.

I am very close to earning the 2021 Stampin' Up! Incentive Trip to Maui and your orders can help me get there. I am running a few special promotions until the end of September to not only help me earn this trip but to help you save a little cash as well. I am kicking off my Maui of Bust Promotions with a Mega Holiday Embellishment Product Share. The deadline to take part in the Mega Holiday Embellishment Product Share is August 21, 2020. You can check out what's all included in this Mega Holiday Embellishment Product Share by clicking here. I will have a new smaller promotion each week that runs from Tuesday of one week till Monday of the following week. So be watching for those as well. Some promotions will only last a couple days.
With each $1000 I earn I will be cutting off a chain from my Maui or Bust Countdown Chain.