Hello and welcome to my blog; today I am going to share with you a card that I made yesterday using the To A Wild Rose Stamp Set and some of my Stampin' Blends. To A Wild Rose is a great layering stamp set that actually is a Million Dollar Sales Achiever Set that is currently in the Stampin' Up! Annual Catalog. I love this card that I created it just makes me happy. Here's a look at my card.
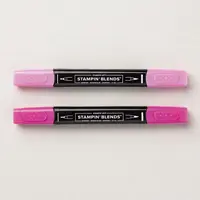
For my card today I stamped the outline of the rose from the stamp set three times using Tuxedo black ink and the leaves cluster three times and a couple other times so that I could have some extra leaves. Once the ink dried I started the coloring process. All the leaves where colored with Soft Suede light & dark Stampin' Blends. I then colored the flowers next. For the lighter pink flower I colored with my Flirty Flamingo and Lovely Lipstick combo blends. The darkest areas were done with the Dark Lovely Lipstick and blended out until I got to the lightest area.
The two darkest roses were colored with just the Lovely Lipstick light and dark blends. Once I had everything colored I colored in the centers of the roses with my dark Daffodil Delight. I then took a white gel pen and added some little white dots to the centers.
Once all the coloring was done it was time to use the matching dies to cut out the roses and leaves. The leaves that I stamped that was just the the single leaf I cut out with my paper snips. I laid out my arrangement onto the card and then used press and seal to hold it into place while I worked on my card base.
I used the Decorative Mask Stencils and did a little ink blending in Flirty Flamingo ink on the area that the flowers were going to be at. I then flicked on some Flirty Flamingo and Lovely Lipstick ink. Once the ink had dried I added a little liquid glue behind the leaves and flowers that was facing up on the press and seal. I then placed the cluster of flowers (still on the press and seal) onto the card base. I then pulled the press and seal back up with the remaining flower and a couple leaves up and added a few Stampin' Dimensionals behind them. I then placed that flower and leaf back onto the arrangement.
I stamped my sentiment in Tuxedo Black ink in the bottom third of the card base. I then added a few sequins to finish off the arrangement. I trimmed off the leaves that were over hanging off the card.
Thanks for dropping by today, I hope that you have enjoyed my little card for today.
Happy Stampin'
Rick Adkins
If you live in the
US. I would love you to choose me as your demonstrator. If you
would like to purchase any of these products you can click on the Shop Now
Button or by clicking on any of the images below. Alternatively, you can
also contact me by email to place your order. Please be sure to use the
monthly host code and I’ll send a little something out to you the following
month to say Thank You!
October HOST CODE: SQ2WWJZN
1. Spend any
amount with me this month and receive the Creative Stampers Tutorial Bundle
featuring Fall & Halloween Projects. Plus get a gift from me in
November.
Please remember that if you use the host code you cannot use that
order towards my KCRP’s (Kinmon Crafty Reward Points) that would be double
dipping and is not allowed. For more information on KCRP’s click here.
Three
main reasons to Join!
1. You Get at least a 20% discount
on all your orders while you are a demo.
2. You get to join my fun Kinsmon
Crafters Team and Private Facebook Group.
3. Access to directions to all my
online classes
Stampin' Up! Shopping List: