Hello and welcome to my blog; today is Sunday so that means it's time for a Simple Sunday project. This week I am sharing a card that I made using the New Sale-A-Bration set Counting Sheep!. You can earn this stamp set FREE with a $50 purchase in my online store until September 30th. Plus, it's a darn cute little stamp set. Here's a look at my Simple Sunday project.
I will also share some simple coloring tips with you today as well...
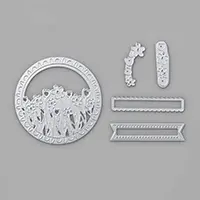
Hello and welcome to my blog; today I am going to share with you a card that I made using the Celebrate Sunflowers Stamp Set and a little watercoloring. Here's a look at my card.
Hello and welcome to my blog; today I am going to share with you my Warm & Toasty Watercolor cards that I made last night during my weekly Facebook Live. If you have never joined me for a Facebook Live I go live on Wednesday normally around 3 pm CST on my Facebook Business Page.
This week I shared how to make a Christmas card using the Warm & Toasty Stamp Set from the August-December Stampin' Up! Mini Catalog. I also share with you three different versions of the same card one for Beginner crafters, one for a Casual Crafter, and one for the Avid Crafter.
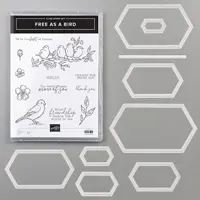
Hello and welcome to my blog; today I am going to share with you a fun card using the Free as A Bird Stamp Set, and some tips & tricks on using Stampin’ Up!’s Watercolor Pencils. I have been playing with watercolor pencils for a long time and had a love hate relationship with them until Stampin’ Up! ®™ came out with their own a couple years ago. Now I am in hog heaven using them. Here is a look at the card I made today.
The Birds in the Free as A Bird Stamp Set are so cute and are just begging to be colored with your watercolor pencils. Do not be afraid just go for it. Once you follow a few simple tips & tricks I have for you today you will be able to send these cute little birds to all your friends because they deserve it.
Our Watercolor Pencils now come in two sets, of high-quality, smooth color pencils; that are perfect for watercoloring any stamped image. One thing that will help you to achieve a great look with your pencils is the type of paper you use. You can use Whisper White cardstock just like I did today, but you must treat it very nicely. Meaning you cannot use an aqua painter on plain cardstock. You can however use a Blender Pen for best results. This is my preferred method for moistening the pigment and moving it around to fill in my line art image. Aqua Painters or any other type of water brush holds and release way too much water for the smooth Whisper White cardstock surface.
Now if I do use a aqua painter or want to use more water to more the pigment around for a nice wash type background I pull out my shimmery white cardstock or watercolor paper for this. But I did not need that today, so I just stuck with the blender pen and the plain whisper white cardstock.
Another thing you need to consider is the type of ink you are using. If you are using a die-based ink like I did today you must sit the cardstock aside for awhile to completely dry or heat set with a heat tool. I choice to just sit it aside and let the ink dry and soak into the cardstock. Stazon which is the preferred ink for watercoloring is not one of my favorite inks, so I am fine with letting the other sit and dry the card my take a little longer, but I am happy to wait.
My next tip and this one is the most important one is how and where you hold your pencil. Yes, there are certain places to hold your watercolor pencil or any pencil in art to achieve the correct look. Watercolor pencils are all about the amount of pigment you put down on the paper. You may be wondering why I put this here. Well it’s because the closer to the end of the pencil you are holding in your hand the more pigment you are putting down on the cardstock. So, if you want a dark area of color come closer to the point of the pencil and color. Which means the for lighter and mid-range color you need to come back further from the tip of the pencil. A good rule of thumbs is to hold the watercolor pencil in the middle area of the pencil for a medium amount of pigment to be placed on the cardstock. And for lighter areas you want to hold the pencil closest to the end of the pencil as you will see in the video.
Once I have the entire image colored, I will come back with my blender pen and wet the pigment and get it to move around the cardstock blending the darks mediums and lights together. This is how I achieved the gradient look on my images today.
Video Tutorial:
I hope that you find these little tips and tricks helpful as you explore watercolor pencils and stamping. If you need any of the supplies, you have seen today you can pick them up in my online store by clicking on the item in the shopping list below.
Happy Stampin'
Rick Adkins
Use the Host Code on any order of $50 (before taxes & shipping) or more during the month and receive a gift from me in May as a Thank You. If your order is $150 or more, please do not use the host code. You will forfeit your Stampin' Rewards if you do; and I want you to get those rewards.
If you place any size order with me during the month of May, you will receive the May Creative Stampers Tutorial Bundle from me as a little thank you. This month's tutorial bundle features Birthday Bonanza Suite of Products from the January-June Mini Catalog. The Creative Stampers Tutorial Bundle can either be earned for FREE with any size order or Can be purchased for $20 from me.
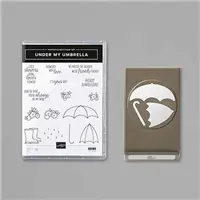
Hello and welcome to my blog; today I am going to share with you a super cute card using the Under My Umbrella and Welcome Easter Stamp Sets. I created a super cute Easter Card for today's project and I made it rain in the background. Basically because it seems to rain every Easter here where I live. At least for part of the day anyways. Here's a look at my card.
Tips & Tricks:
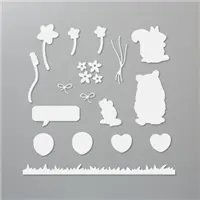
To start off I stamped all the images in Tuxedo Black ink and heat set the ink so that I could do a little coloring with my watercolor pencils. I used both sets of watercolor pencils for the coloring, and once I had everything colored I used my blender pen to moisten the pigment of the pencils to give it a watercolor look. Once the watercoloring was complete I cut out all the little animals and used the Umbrella Punch to punch out the Umbrellas.
Next I used the grass die from the Special Day Die Set and the flowers from the Sending Flowers Dies (both are part of the Coordinating Product Release) to cut out the grass and the flowers for my cards. After that I took a piece of Whisper White and did a little ink blending for the background sky. After that I took the Basic Pattern Stencils (the Clouds pattern) and stenciled on some darker blue at the bottom of each cloud and whisper white craft ink on the top to add a little variation. Then I stamped some rain drops in Balmy Blue ink and attached the grass die cut. I added a little grass that that I stamped to this area to add a little extra to it.
To finish off my card I added the cut out animals and umberas along with the flowers to the card front. To make it so the tulips were not floating in air I added stems to each with my granny apple green stampin' write marker, and some of the Happiness Blooms Enamel Dots to the center of the flowers. I added the sentiment on a piece of whisper white cardstock stamped in Balmy Blue and cut it out with \the banner die from the Sending Flowers Dies.
Thanks for dropping by today, I hope that you have a wonderful day. If you need any of the supplies I used to create this card you can pick them up in my online store by clicking on the item in the supply list below. Make sure you join my this afternoon on my Facebook page for this weeks Facebook Live mini Class featuring the Welcome Easter Stamp Set.