Hello and welcome to my blog; today I am going to showcase a card that I made as part of a Demonstrator Training event by Ronda Wade back in December. I CASEd the card from the one that she designed for one of the Make & Takes for the event. But it's just so darn cute that I couldn't help but copy it and share it on my blog with you today. Here's a look at the card.
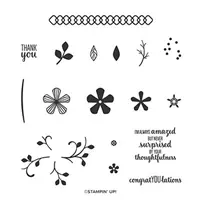
Hello and welcome to my blog; today I am going to share my project for this week's themed challenge over at The Spot. This week's challenge is a Spring themed challenge. I used the Thoughtful Blooms Stamp Set which is part of Sale-a-bration. Speaking of which today is the last day to earn any of the free Sale-a-bration items with your qualifying orders. Here's a look at my card.
Tips & Tricks:
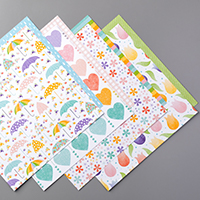
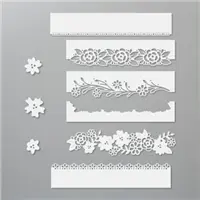
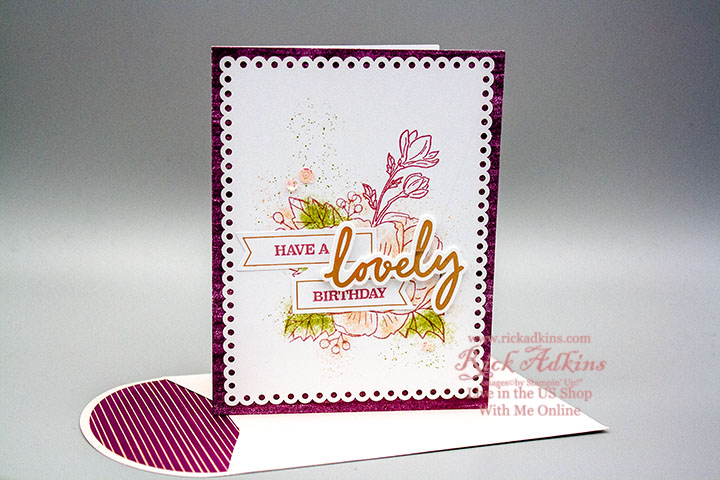
I started my card for today's challenge with a 5 1/2 x 8 1/2 piece of Thick Whisper White Cardstock. I used one of the Ornate Border Dies (which comes out April 3, 2020) along the edge to cut the floral decorative border. Next I added a piece of the Pleased As Punch Designer Series Paper to a piece of Pear Pizzazz Cardstock and attached this to my card front.
I then stamped my sentiment onto a piece of Whisper White Cardstock along with some of the small blooms from the Thoughtful Blooms Stamp Set. I stamped the sentiment in Pear Pizzazz Classic Ink, and the flowers in Petal Pink Classic Ink and So Saffron Classic Ink. I then used the Label Me Lovely Punch to punch out the sentiment and a piece of Pear Pizzazz Cardstock. I used the Small Blooms punch and punched out the flowers. I took the pear pizzazz label and cut it in half and placed behind my sentiment piece so that I had a little colorful border showing to make the border stand out from the card front. I added the sentiment piece to the card front with a couple Stampin' Dimensionals. I then added the small flowers around the card base with mini glue dots.
Next I finished off my card by adding a small pearl in the center of each flower. I also added a strip of the same designer series paper on the inside of the card to and a strip of Pear Pizzazz Cardstock to tie everything in. This was the finishing touches to my card today.
Here's a look at the themed challenge inspiration. You can play along by clicking on the image below.
Happy Stampin'
Rick Adkins
If you live in the US. I would love you to choose me as your demonstrator. If you would like to purchase any of these products you can click on Shop Now or by clicking on any of the images below. Alternatively, you can also contact me by email to place your order. Please be sure to use the monthly host code and I’ll send a little something out to you the following month to say Thank You!
Use the March Host Code on any order of $50 (before taxes
& shipping) or more during the month and receive a gift from me in April as
a Thank You.If your order is $150 or
more, please don't use the host code.You will forfeit your Stampin' Rewards if you do; and I want you to get
those rewards.
If you place any size order with me during the month of
March, you will receive the March Creative Stampers Tutorial Bundle from me as
a little thank you.This month's
tutorial bundle features fourteen floral themed tutorials.The Creative Stampers Tutorial Bundle can
either be earned for FREE with any size order or Can be purchased for $20 from
me.
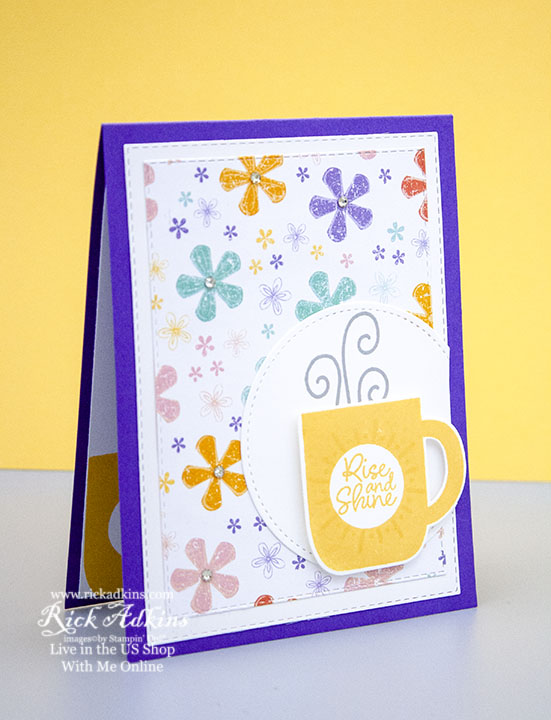
Hello and welcome to my blog again for my second post today; You may be wondering why I have a post going up so late in the evening today? Well, it's because I am taking part in the very first Global Stampin' Video Hop and I am going to share that here with you and the project I made for this Global Stampin' Up! Independent Demonstrator Vlog Hop. We have demonstrators from all over the world sharing videos with you today as part of the Global Stampin' Video Hop, I believe we have someone from almost every market that Stampin' Up! is in. So this is a great way to see what other's around the world are sharing using the wonderful products from Stampin' Up!. This will happen each month on the last Friday of the month (which for me falls on the last Thursday of the month due to my time zone here in the US), where we will be sharing a project video with you featuring a new theme around some of the best products around. This month our theme was "NEW". We could pick from any thing that would be new; like a new baby, new home, new product, new whatever. I picked to share a new product that will be coming out in a few days as part of the 2nd Sale-A-Bration release. I am going to share with you a card that I made using the new Rhine & Shine Reversable Sale-a-bration stamp set. Here's a look at my project.
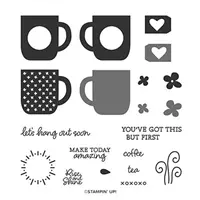
I just love this little fun stamp set and so will any coffee or tea drinker in your life. It has such fun sentiments and imagery that will make anyone happy. I paired this with the Please as Punch Designer Series Paper for a fun colorful card that would make you just feel super happy if you received this card. My card base is a piece of Gorgeous Grape cardstock cut to 4 1/4 x 11 scored at 5 1/2 to make a top folding card. I used the Stitched Rectangle Dies to cut out my mat and Designer Series Paper layers. I used the largest and next to largest rectangle dies to do that. I just love how the Stitched Rectangle Dies layer together perfectly. The Rise & Shine Stamp set makes you want to rise and shine and start stamping! Use the Rise & Shine Stamp Set to create cards and other projects with hot morning beverages and greetings that are sure to warm anyone’s heart. This stamp set is a Reversibles** set, so some of the stamps are two sided with an image on each side of the stamp for more creative options. Earn this stamp set FREE March 3–March 31, 2020, during part two of our Sale-A-Bration promotion!
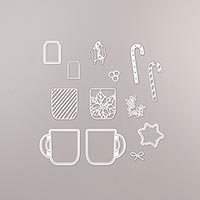
To cut out the stamped cups and a couple of the other images in the stamp set I used the I used the Cup of Cheer Dies from the 2019 Holiday Catalog. Yes, these were listed on the Retirement list so if you pulled yours and put them in your retired stash you will differently want to pull them back out again to have a fun time matching them with the Rise & Shine Stamp Set.
The Rise & Shine Stamp Set with the Cup of Cheer Dies will add a little warm feeling to your heart during the Spring and any other season that comes along.
Video Tutorial:
Here you will find my video which is part of this video hop. If you are viewing this post by email you may have to click here or the image below to see the video. Not all mail servers will show the embedded video.
After layering the designer series paper and the whisper white mat onto my card base I cut out a the largest stitched circle from the stitched shape dies and added it to the card front with the steam image stamped on to it with Smoky Slate ink. I then placed it so that it was coming off the edge of the card and snipped off the excess. I then stamped one of the cup images from the set and cut it out with the Cup of Cheer Dies and placed it on the circle where it looked like the steam was coming from the cup. I popped the die cut cup up with a few Stampin' Dimensionals to give it a new layer.
I then stamped the same cup onto a piece of 4 x 5 1/4 piece of whisper white along with another sentiment from the stamp set for the inside of my card. And, glued it to the inside with multipurpose liquid glue. To finish off my card and add a little shine to it I added a few Basic Rhinestones on some of the flowers on the Pleased As Punch Designer Series Paper layer (which by the way matches punches from the Sale-a-bration brochure and the January-June Mini Catalog.) If you don't have this paper yet you totally need to grab it and any other of the coordinating products before they are gone. They are only while supplies last or until March 31, 2020.
Next on the Video Hop if you're not on my YouTube channel is Jana Muller You can see her video by clicking the next button above or by clicking on the video below.
Thanks for dropping by I hope that you have fun hopping along the video hop with us this evening. If you need any of the supplies that I used to create my project today you can pick them up in my online store by clicking on the item below in the shopping list. Remember that the Rise & Shine Stamp Set can be earned with a qualifying order starting on March 3, 2020 and will be while supplies last till the end of Sale-A-Bration. If you want to get your hands on them early you can purchase them as a demonstrator by joining my team of Kinsmon Crafters. Plus until the end of Sale-A-Bration you not only get to pick $125 in products for only $99 but you get the mini trimmer, the DSP sampler pack and a stamp set of your choice along with a paper pumpkin kit, a business pack all valued based on your stamp set choice to $247.
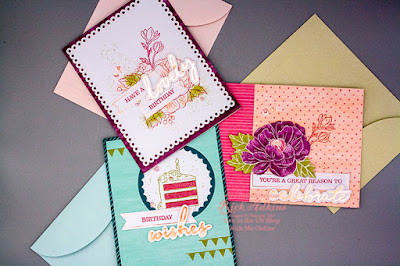
Hello and welcome to my blog; today I am going to share with you the unboxing and reveal of the February 2020 Paper Pumpkin Kit Lovely Day. Paper Pumpkin is a monthly subscription kit by Stampin' Up!. Everything you need comes right in the box. This is a super beautiful kit this month. And, it contains nine cards 3 each of 3 designs. Here's a look at this month's projects.
This month's kit contains a sheet of die cuts, a sheet of sentiment banners with rose gold accents, exclusive Lovely Day Stamp Set, Rococo Rose Stampin' Spot, Coordinating Envelopes, Foil Foam Stickers (with Rose Gold Accents), a sheet of dimensionals and mini glue dots along with some Petal Pink Sequins. Plus you have all your card bases for each of the designs. The great thing about Paper Pumpkin is that everythings all designed and ready to go when you receive you box in the mail. If you don't have a large budget or are just starting out crafting, or even don't have a lot of room for craft supplies. Paper Pumpkin is perfect for you since it's cost effect ($22.00 a month plus tax), it's small and compact, and can be stored anywhere, plus everything is sent right to your door ready to go.
Unboxing Video and How to Assemble:
If you are viewing this post by email you can click here or the image below to view the video.
This month's kit coordinates with the Happy Birthday to You Stamp Set from Saleabration. In this month's projects and free stamp set you see some coordinating images that match the stamp set. For example the flower you see here are the same flowers on the cake image from the Happy Birthday to You Stamp Set. You also have the cake imagery but instead of a whole cake you have a cake slice. Plus this month's kit stamp set has some wonderful sentiments. This month's Coordinating colors are Rococo Rose, Rich Razzleberry, Pretty Peacock, Old Olive, Petal Pink, and Pool Party.
The cards this month are full size A2 (5 1/2 x 4 1/4) cards. The card with the Rich Razzleberry Flower die cut on it features a super cute closure. It has a panel that has a tab that inserts into the Rose Red Side.
Closer Look at This Month's Projects:
Now it's time to take a look at this month's project. I only made one each of the three cards in the video, but afterwards I put them all together and it only took about thirty to forty-five minutes. The first card that I put together was the super cute card with the large flower die cut. I love how this card goes together with the fun little tab insert. All the stamping for this card was the little flower buds and the sentiment.
The second card was the super easy birthday card. This card could go for both sexes. The stamping for this card is the layers in the cake and the sentiment. I love the foil foamed sticker sentiments.
The last card for this month's kit is the scalloped edge card, with the flower and and the double banner. This card has a fun look but simple. I loved how the color for the flower was already printed on the card, and once you stamp the flowers over it the image is completed.
You have two different ways to subscribe to Paper Pumpkin each month. You can do the Month to Month payment (which is what I prefer to do) or you can pick one of the four Prepaid Subscriptions. You do save a little with the prepaid subscriptions, plus during Saleabraiton you can earn Free Salebration items with the 3, 6, and 12 month subscriptions.
Join my NEW Online Technique & Fancy Fold Club! You can find out all the details byclicking here!
Last day to sign up for my Monthly Card Club by February 20, 2020! Sign up and learn more about Card club byclicking here! February's featured stamp set is the Morning Star Stamp Set. Stamps sets are not included in the club but may be purchased using the host code as an add on. Or you may use something you already own.
Receive the January Creative Stampers Tutorial Bundle with any size order! Features 17 projects designed by Stampin' Up! demonstrators from around the world. This month we all featured a item in the Sale-a-bration Brochure.