Showing posts with label Playful Penguins. Show all posts

Tuesday, December 17, 2019

Mirror Stamping: featuring Playful Penguins Video Tutorial

Hello and welcome to my blog; today I am going to share with you a fun technique for my new series Technique Tuesdays.  Each Tuesday I will be sharing a different technique with you.  I know exciting right.  I will also be having a Technique Club starting in January where you can learn even more techniques more information on that soon.  But for my card today I am going to share a fun technique called mirror stamping.  It's a fun easy way to get a reverse image of a stamped image that only goes in one direction; and sometimes we want to have the same image go the other direction.  So we might want to have something looking at itself or something facing the other way.  Mirror stamping is the answer on how to do just that.  I based this card from last weeks Casing Tuesday sketch.  Here's a look at my card.

Tips & Tricks: 

Mirror stamping isn't that hard once you get the hang of it and there's a lot of ways to do this technique.  I am going to share the one I learned back in November at the Onstage in Atlanta.  I've tried the others and this was the easiest I've ever tried.  And, had the best results with.  I picked the Playful Penguins Stamp Set to do my card today.  It's one of my favorite sets and sadly it's on the retiring list.  So if you want to get these little cuties if you haven't already; you need to do so ASAP.  
 There are some tools you will need to make this technique work.  One of the main tools is a Silicone Craft Sheet.  This and the Stamparatus was vital in making this technique easy and produced the best results I've gotten.  So, I think these tools are a must have to get great results.  Once you have those two things you can pick out your favorite image and get to stamping.  
I started by stamping the penguin closest to the fold line first, using my Stamparatus.  I didn't move the stamp.  I removed my cardstock and replaced it with my Silicone Craft Sheet.  I then inked up my stamp again and stamped it on the Silicone Craft Sheet.  I then repeated the stamping one more time because I wanted to have enough ink on the craft sheet.  Once that was done I took my card front and flipped it over where I was looking at the back and placed it over the silicone craft sheet.  Without moving the cardstock I took the door of the Stamparatus and stamped the image on the back of the cardstock.  This allowed the image to be transferred with enough pressure that I got a great stamped impression.  And that was it that was the technique.  

Once everything was stamped it was time to put my card together.  I added the stamped card front to my Shaded Spruce card base after stamping my greeting.  I then added two strips of Wrapped in Plaid Designer Series Paper to the bottom of the card front.  I added a insert to the inside of my card and added another cute little penguin along with my Christmas Sentiment.  

Video Tutorial:   


If you are viewing this post by email you may have to click here or click on the image below to view the video.  

Sizes & Dimensions: 

  • Shaded Spruce Cardstock 4 1/4 x 11 scored at 5 1/2
  • Whisper White Cardstock 4 x 5 1/4 (2) 
  • Wrapped in Plaid Designer Series Paper 5/8 x 5, 5/8 x 4
Happy Stampin' 
Rick Adkins 

If you live in the US.  I would love you to choose me as your demonstrator.  If you would like to purchase any of these products you can click on the Shop Now Button or by clicking on any of the images below.  Alternatively, you can also contact me by email to place your order.  Please be sure to use the monthly host code and I’ll send a little something out to you the following month to say Thank You!  

December HOST CODE:  CEUXJX6R
  1. Spend any amount with me this month and receive the Creative Stampers Tutorial Bundle.  Plus get a gift from me in January.
Please remember that if you use the host code you cannot use that order towards my KCRP’s (Kinmon Crafty Reward Points) that would be double dipping and is not allowed.  For more information on KCRP’s click here.  

Three main reasons to Join!  
1.     You Get at least a 20% discount on all your orders while you are a demo.   
2.     You get to join my fun Kinsmon Crafters Team and Private Facebook Group.
3.     Access to directions to all my online classes 

Stampin' Up! Shopping List: 


Friday, October 11, 2019

Playful Penguins Sunset Silhouette Card

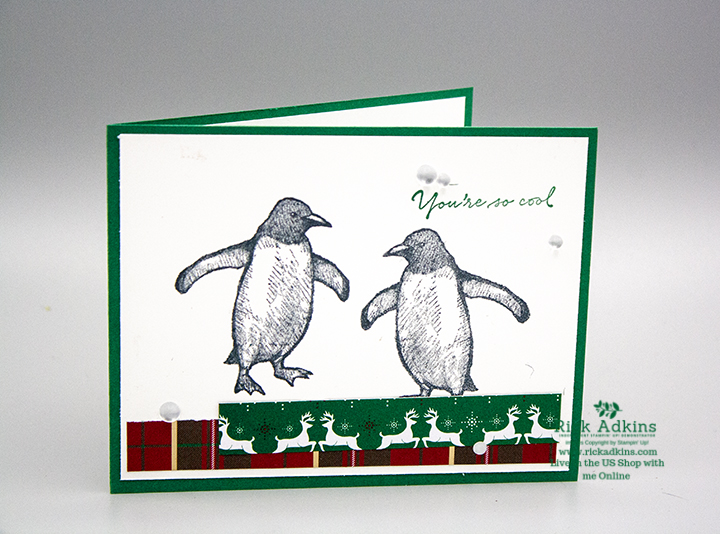
Hello and welcome to my blog:  Today I am going to share with you a fun technique that will stretch your stamp collection and allow you to make some fun unexpected cards as well.  Sometimes there's nothing more attractive then a sunset on a cold winter day.  Then you add to that a bold graphic figure in silhouette and your heart will start to go pitter pat.  There's just something about those beautiful bold colors in the sky either as the sun is raising or starting to set paired with the dark image in front of it that is just so very striking.   That's exactly what I did for my card today, I brought both of these wonderful things into my card today.  Let's have a look at my project shall we.

Tips & Tricks: 

Creating this look isn't as hard as you may think; as long as you have the right mind set and tools to create it.  Anytime I create one of these types of cards I always start with Masking off anything that needs to be the white of the paper.  Next comes my sunset area.  Because, it's one of the main draws to the card and one of the most crucial parts.  If you don't have your sky right people will be drawn to it.  The trick to ink blending is to just keep going until you're happy with the way it looks.  Sometimes it may take up to 30 minutes or longer to get the ink to blend jsut right.  But, if you keep going back and forth between the colors it will start to blend out.  My go to sunset colors are Crushed Curry, Pumpkin Pie, Rich Razzleberry, and either a little Blackberry Bliss or Night of Navy.  
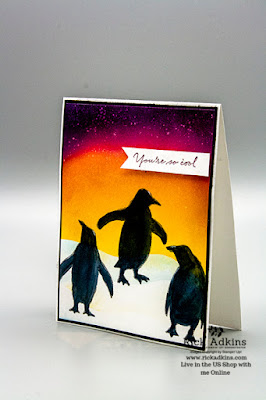
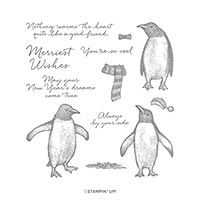
After the sky is nice and blended I can peel off my snow mound masks and start stamping my silhouette images.  The most common way of stamping these images are with solid image stamps, but you can do it the way I did today with regular plain stamps.  It just adds in an extra step, but what's one more step to getting a beautiful card, right? 
Once I had the penguins stamped out on the card front I then came back and simply colored them in with my Basic Black Stampin' Blends.  Yep, that was all I had to do to get these bold images to appear they were in silhouette.  So, What stamps do you already own can you do this technique with to get a new look from your stamp collection?  I bet you can think of about 10 sets you haven't touched in a long time.  I highly encourage you to give both of these techniques a try and breath a little new life into your stamp collection.  Thanks for dropping by today, I hope that you have a great day and I will see you again tomorrow with this week's episode of Rick's Saturday Simple Stamping.  Until then Happy Stampin'!
Happy Stampin' 
Rick Adkins 
If you live in the US.  I would love you to choose me as your demonstrator.  If you would like to purchase any of these products you can click on the Shop Now Button or by clicking on any of the images below.  Alternatively, you can also contact me by email to place your order.  Please be sure to use the monthly host code and I’ll send a little something out to you the following month to say Thank You!  

October HOST CODE:  SQ2WWJZN

  1. Spend any amount with me this month and receive the Creative Stampers Tutorial Bundle featuring Fall & Halloween Projects.  Plus get a gift from me in November. 


Please remember that if you use the host code you cannot use that order towards my KCRP’s (Kinmon Crafty Reward Points) that would be double dipping and is not allowed.  For more information on KCRP’s click here.  


Three main reasons to Join!  

1.     You Get at least a 20% discount on all your orders while you are a demo.   
2.     You get to join my fun Kinsmon Crafters Team and Private Facebook Group.
3.     Access to directions to all my online classes 

I All Ready Know I Want to Join!  Sign Me UP!

Stampin' Up! Shopping List: 


Template Designed by creativeworkerbee