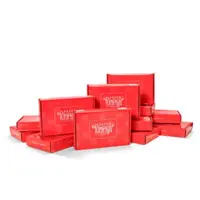
Hello and welcome to my blog; today I am going to share a few alternative projects using the May 2019 Paper Pumpkin kit Hugs from Shelli. I am super excited to play with this kit which was designed with Shelli Gardner Stampin' Up!'s Co-Fonder. This was a super fun kit to play with and I may have been a little over zealous with my alternatives this month. So let's jump into them right now.
So for my projects this month I created not one card but five different designs and did two of each design plus created a large gift box that would hold all ten card, envelopes and with a little room for more. This was super fun today. I kept my cards on the simple side. I used five pieces of cardstock to create each card plus the note cards that came in this month's kit. I did throw in a couple scraps of whisper white cardstock to finish off my sentiments. Here's a look at my cards.
,For two of the card designs I had to cut the note cards in half to have enough to make all 10 cards. So once I had these all made I needed someplace to put them so I created a large gift box that will hold all 10 cards plus envelopes for each. This makes for a super quick and easy gift. Here's my gift box.
I used a couple pieces of cardstock to make the box and a little designer series paper. The designer Series paper you see comes from the Bird Ballard Designer Series Paper Stack (new in the 2019-2020 Annual Catalog). From this month's kit I used some of the die cut elements and the Pretty Peacock Velvet ribbon. This box is super easy to make as you will see in my video tutorial.
If you are viewing this post via email you will need to click the image below to see the video.
Product List
So for my projects this month I created not one card but five different designs and did two of each design plus created a large gift box that would hold all ten card, envelopes and with a little room for more. This was super fun today. I kept my cards on the simple side. I used five pieces of cardstock to create each card plus the note cards that came in this month's kit. I did throw in a couple scraps of whisper white cardstock to finish off my sentiments. Here's a look at my cards.
,For two of the card designs I had to cut the note cards in half to have enough to make all 10 cards. So once I had these all made I needed someplace to put them so I created a large gift box that will hold all 10 cards plus envelopes for each. This makes for a super quick and easy gift. Here's my gift box.
I used a couple pieces of cardstock to make the box and a little designer series paper. The designer Series paper you see comes from the Bird Ballard Designer Series Paper Stack (new in the 2019-2020 Annual Catalog). From this month's kit I used some of the die cut elements and the Pretty Peacock Velvet ribbon. This box is super easy to make as you will see in my video tutorial.
Thanks for dropping bye today; I hope that you have enjoyed my alternative projects this month and that you will take the time to hop all the way along the blog hop. We have some special guests with us this month so I know you will want to check them out. If you are viewing this post on my wordpress site you will need to click here to view the blog roll.
Happy Stampin'
Rick Adkins


