You are not a drop in the ocean. You are the entire ocean in a drop. I loved this quote by Rumi that was part of the United Through Creativity Digital Download and is the sentiment from the digital stamps that I picked for my card today. Hello and welcome to my blog; I am glad that you are here.
During my weekly Facebook Live last night I shared how to make this card and how to do some simple watercoloring with your ink pads. I go live every week on Tuesday nights at 8:30 pm CST on my Facebook Business Page. You can join me there each week for a live card making session.
Hello and welcome to my blog; today I am going to share with you the card that I made last night during my weekly Facebook Live. Each week I do a Facebook Live featuring a fun project or projects to you right in your home at 8 pm CST. This week I played with products from the new Mini Catalog. I used products from the Peaceful Poppies Suite. Here's a look at the project.
Tips & Tricks:
For my card today I used the Painted Poppies Stamp Set along with the Peaceful Moments Bundle to create the beautiful floral card. I love the Painted Poppies Stamp set and the Peaceful Moments stamp set they are both in my top 10 for the Spring. The Painted Poppies Stamp Set is inspired by a field of poppies and features beautiful line-art images you can fill in with your choice of coloring techniques. The Peaceful Moments Stamp set features greetings, greetings, and more greetings. Whatever the situation, the Peaceful Moments Stamp Set has the words you need to express your thoughts. Here's a look at the entire suite of products.
Being a watercolor person I love the designer series paper because I can create a card without having to drag out any paints. It's all done for me without any mess. Which was why I pulled it into my card today.
But the main star of this card is the Poppy Moments Dies. With these dies you can create fancy, layered die-cut poppies, leaves, and more to add beauty and depth to your handmade cards, scrapbooks, journals, and other paper crafts using the Poppy Moments Dies. Pair the dies with the coordinating Peaceful Moments Stamp Set to add heartfelt sentiments to your projects for birthdays, congratulations, sympathy, thank you, and more. These dies are so easy and fun to play with.
Measurements:
·Poppy Parade:4 ¼” x 11” (scored at 5 1/2”)3” x 3” (for flower)
·Pool Party:3 ¼” x 4”
·Old Olive:3” x 4”
·Whisper White:4” x 5 ¼” (inside).½” x 2 ¼”
·Mossy Meadow:Scrap leaf base
·Basic Black: Scrap for flower center
·Flirty Flamingo:2 ¼” x 5 ½”3” x 3” (for flower)
·DSP:2” x 5 ½”
Video Tutorial:
If you are viewing this post by email you may have to click here or click on the image below to see the video.
Thanks for dropping by I hope that you had a wonderful Christmas Holiday and a Happy Rest of the Holiday Season. See you soon.
Hello and welcome to my blog; today I am going to share with you the project that I made last night during my Facebook Live. I do a weekly Facebook Live each week on Wednesday Night at 8 pm CST. Each week I do a different project using Stampin' Up! products. I showed how to make a turn about type card last night using the Nine Lives Stamp Set, just in time for National Cat Day; which by the way is on the 29th. Here's a look at my card.
How to Make A Turn about Jig:
You can make your own turn about jig with just a 6 x 6 piece of cardstock or acetate. You have to make it from corner to corner and make the middle point. You then line up all the images in one of the quarter of the jig. ink all the stamps up in a light color and stamp the images, turn the entire piece and repeat until you are all the way around. Next you will rearrange the images a couple in each section. Ink up the images and stamp in dark color, you will look for how the images line up and not over lap. Turn and repeat this process until you get all the way around, making any adjustments that may be needed. Once you have this done and there's no over lap you can start using the jig.
Once I had everything stamped out I cam back in and stamped the sentiment on the card front, and then stamped the cat on a piece of scrap paper. I used the Cat Punch and punched out the car and added it to the card front with a few dimensionals.
Video Tutorial:
If you are viewing this post by email you may have to click here or click on the image below to view the video. Some email servers will not show the embedded video.
Thanks for dropping by today, I hope that you have liked my little card today for National Cat Day. How are you going to celebrate on October 29, 2019.
Happy Stampin'
Rick Adkins
If you live in the
US. I would love you to choose me as your demonstrator. If you
would like to purchase any of these products you can click on the Shop Now
Button or by clicking on any of the images below. Alternatively, you can
also contact me by email to place your order. Please be sure to use the
monthly host code and I’ll send a little something out to you the following
month to say Thank You!
October HOST CODE: QU2TJBJN
1.Spend any
amount with me this month and receive the Creative Stampers Tutorial Bundle
featuring Fall & Halloween Projects. Plus get a gift from me in
November.
Please remember that if you use the host code you cannot use that
order towards my KCRP’s (Kinmon Crafty Reward Points) that would be double
dipping and is not allowed. For more information on KCRP’s click here.
Three
main reasons to Join!
1.You Get at least a 20% discount
on all your orders while you are a demo.
2.You get to join my fun Kinsmon
Crafters Team and Private Facebook Group.
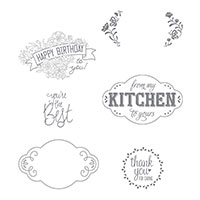
Hello and welcome to my blog; today I am going to share with you the super quick and easy thank you card that I made last night during my weekly Facebook Live. I used the Label Me Pretty Stamp Set; and I will tell you this set has been on my list since it came out but I would keep forgetting to order it until after the order was submitted. This is a great set for so many occasions and uses. It can be used on cards, on tags, and packaging, there's a sentiment to fit your needs. This is one of those sets I consider a must have for any crafter. Here's a look at my card.
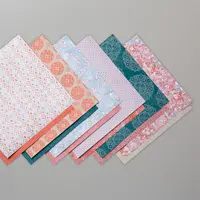
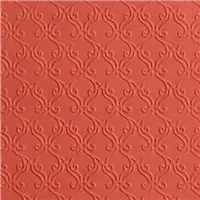
When I designed this card I did so by picking out the designer series paper first. And, then picked my colors around that. I used Pretty Peacock, Purple Posy, and Whisper White. I started with a piece of Pretty Peacock Cardstock for the card base which was cut at 4 1/4 x 11 scored at 5 1/2. My next layer was the Woven Threads Designer Series Paper 4 x 5 1/4, but before I placed it on the card I used the Stylish Scroll Embossing Folder from the Holiday Catalog to dry emboss the paper. This added even more texture to the printed texture on the paper. Which by the way added just that little extra pop that this clean and simple card needed.
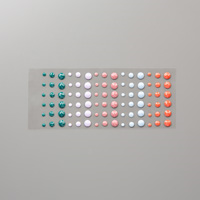
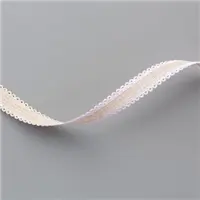
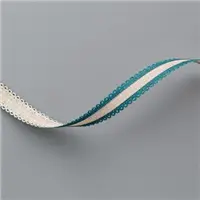
On a scrap piece of Whisper White Cardstock I stamped the label from the set, actually it was two images that created this label, I stamped the first one in Purple Posy Ink, and the next one with the flowers was stamped in Pretty Peacock Ink. Next I used the Pretty Label Punch and punched it out. I added a piece of the Scalloped Linen Ribbon in both colors to the front of the card using Tear & Tape Adhesive. Tear & tape is my go to for adhering ribbon. I then popped up the sentiment using Stampin' Dimensionals. I added a few of the 2019-2021 In Color Faceted Dots to bring in a little more of the Peacock. I added a piece of whisper white to the inside with a small strip of the designer series paper to finish the card.
Video Tutorial:
If you are viewing this post via email and the video does not show you can click here to watch it.
Thanks for dropping by today, I hope that you have a wonderful day and I am glad you spent a little time with me. If you need any of the supplies you can order them by clicking on the image below in the Shopping list.


")