Showing posts with label Christmas Card. Show all posts

Friday, December 13, 2019

Warm Christmas Wishes Rustic Retreat

Hello and to my blog; today I am going to share with you a easy card that you can change out the sentiment on and change why you are sending the card.  I used the Rustic Retreat stamp set as the main focal point of my card along with a another stamp set and the birch background stamp.  This is a card that you can use all year long.  Here's a look at my card.


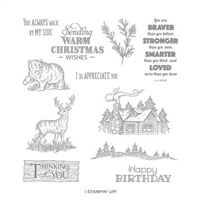
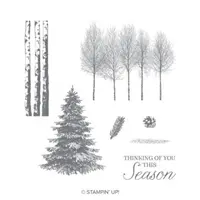
Step into nature with the Rustic Retreat Stamp Set.  This set offers an idyllic setting for creating beautiful moments with its uplifting sentiments and fun forest images, including a friendly bear. The Rustic Retreat Stamp Set was inspired by Million Sales Achiever Mary Polcin.  So it was the perfect stamp set for my card today.  I started out by stamping the card base with the Birch Wood background stamp.  I used Mossy Meadow Ink to match the cardstock.  I then stamped the row of trees from Winter Woods on a piece of Crumb Cake cardstock in Crumb Cake ink.  Then I stamped the cabin and the treeline image from Rustic Retreat in Early Espresso ink on a piece of Very Vanilla cardstock.  For the treeline image I stamped off first before stamping it onto the very vanilla cardstock.  I then stamped the sentiment to make it a Christmas card in Mossy Meadow.
I added a piece of very vanilla on the inside with the pine bough image from Rustic Retreat in Mossy Meadow ink, before adding it to the inside.  For the card front once everything was stamped I started building up the card.  I added the Crumb cake piece to the center of the card base using Multipurpose Liquid Glue. I then added the Very Vanilla piece in the center with Stampin' Dimensionals.
To finish off the presentation of the card I decorated the Very Vanilla envelope with the Birch Wood Background stamp on the flap in Mossy Meadow ink.  By, repeating some of the patterns and the colors it ties everything together.  If you want to change the sentiment you can make this card into any all occasion card to send to anyone.

Sizes & Dimensions: 

  • Mossy Meadow 5 1/2 x 8 1/2 scored at 4 1/4
  • Crumb Cake: 3 3/4 x 4 1/4 
  • Very Vanilla:  2 x 4 1/4, 4 x 5 1/4 (inside) 
Thanks for dropping by today, I hope that you give this cute little rustic card a try if it's for a Christmas card or for a all occasion card.  I know you will love it.  
Happy Stampin' 
Rick Adkins 


If you live in the US.  I would love you to choose me as your demonstrator.  If you would like to purchase any of these products you can click on the Shop Now Button or by clicking on any of the images below.  Alternatively, you can also contact me by email to place your order.  Please be sure to use the monthly host code and I’ll send a little something out to you the following month to say Thank You!  


December HOST CODE:  CEUXJX6R
  1. Spend any amount with me this month and receive the Creative Stampers Tutorial Bundle.  Plus get a gift from me in January.
Please remember that if you use the host code you cannot use that order towards my KCRP’s (Kinmon Crafty Reward Points) that would be double dipping and is not allowed.  For more information on KCRP’s click here.  


Three main reasons to Join!  
1.     You Get at least a 20% discount on all your orders while you are a demo.   
2.     You get to join my fun Kinsmon Crafters Team and Private Facebook Group.
3.     Access to directions to all my online classes 

Stampin' Up! Shopping List: 

Tuesday, December 10, 2019

Wrapped in Plaid Gnome Christmas Card

Hello and welcome to my blog; I hope that you are having a great day.  I am going to share with you how to make a Gnome Card for Christmas without using a die.  Yes, you can create your own super cute Gnome card without a die; it just takes a little planning and cutting some paper.  But, don't be afraid I promise it's super easy as you will see in the video tutorial.  I used the Wrapped in Plaid designer series paper for my card today.  Here's a look at my card.


Tips & Tricks: 

Gnomes are super trendy now and surprisingly Stampin' Up! doesn't have a Gnome stamp set or matching dies.   So I had watched a few YouTube videos on the dies that came out recently from another company and thought I can make my own.  So I started out with the Tree punch and punched out his beard.  To make it look more like a beard I used my Stampin' blends to do some wispy lines and a little blending to make it look more realistic. 
Next I used the "beard" to measure and draw out a little template for the body and hat.  I just laid down the tree and went from the each end and made a ovalish shape.  For the hat I just did a simple santa hat shape but with a longer top more like a sleeping cap from A Christmas Carol.   As I am looking at the body now I am thinking I could have just used a oval die or punch and snipped off the bottom.  So if you don't want to draw out a simple template you totally could use that for a body.  After I sketch this out on some scrap cardstock I just cut it out with my snips and traced around it on my designer series paper.  I am using the Wrapped in Plaid Designer Series Paper today on my card.
There's a lot of great patterns in this pack of paper, but you can use any you may have on hand.  You can find a ton of different patterns to make your own cute little gnomes.  Once I had the hat and body cut out I used my blends to add just a little shading to both.  I then punched out two circles using the 1/2" circle punch from Whisper White Cardstock.  One was colored with Petal Pink for the nose and one was colored with Smoky Slate for the ball at the end of the hat.  So once all that was done I had all my Gnome pieces ready to go.
All of the pieces of the Designer Series Paper for this card can be pulled from your scraps if you want.  Once I had everything cut and ready to go it was time to assemble.  I used a little snail adhesive to put everything together and then secured it on the back with some Stampin' Dimensionals.  This also allowed for my little Christmas Gnome to be raised off the card.

Sizes and Dimensions: 

  • Cardbase - Whisper White Thick Cardstock 4 1/4 x 11 scored at 5 1/2
  • Mat #1 - Shaded Spruce 5 3/8 x 4 1/8
  • Mat #2 - Cherry Cobbler 4 x 5 1/4
  • Card front - Whisper White 3 3/4 x 5
  • Gnome - Scraps of Wrapped in Plaid DSP, Whisper White
  • Sentiment Strip - scrap that's 5/8" x 3/3/4 
  • DSP layer - 1 3/4 x 5
  • DSP mat - Cherry Cobbler or Shaded Spruce 2 x 5

Video Tutorial: 

If you are viewing this post by email you may have to click here or the image below to watch the video.  
Thanks for dropping by today I hope that you find this post helpful and that you have fun making your own little Gnome for your cards this holiday season.  
Happy Stampin' 
Rick Adkins 
If you live in the US.  I would love you to choose me as your demonstrator.  If you would like to purchase any of these products you can click on the Shop Now Button or by clicking on any of the images below.  Alternatively, you can also contact me by email to place your order.  Please be sure to use the monthly host code and I’ll send a little something out to you the following month to say Thank You!  

Stampin' Up! Shopping List: 


Price: $10.00

Tuesday, November 19, 2019

Christmas Crowd Snow Scene Card Video Tutorial

Hello and welcome to my blog; today I am going to share with you a fun little Christmas card using the Christmas Crowd Stamp Set along with a little ink blending, and Stampin' Blend Coloring.  Today's card is also part of my 25 Days of Christmas Holiday Card Series.  This is day 11 of the Holiday Card Series and I have a super cute one for you today.  Here's a look at my card.

Christmas is better shared.  So spread some holiday cheer with the help of the friendly group of festive characters in the Christmas Crowd Stamp Set.  Your loved ones will appreciate Christmas greetings from you and your gang.  The Christmas Crowd stamp set is a great set for to color any way that you would like.  I decided to stamp them and do a little masking and Stampin' Blend coloring to create my card today.
I stamped the Christmas Crowd image in tuxedo black ink twice using the Stamparatus and then created a mask on some Avery Repositionable labels.  I cut the mask out and then placed it over the image.  I crated a second mask to create a snow globe or world shape to place the snowflakes in.  for the snowflakes in the circle I used versamark ink and the snowflake image from the Christmas Crowd stamp set and then added clear embossing powder.  Once heat set I did a little ink blending with Seaside Spray, Pacific Point and Blueberry Bushel. I then came back and did a little ink blending out side of the circle once I removed the large mask.
 Once all the ink blending was complete I started the Stampin' Blend coloring.  All my little guys were colored with Real Red, and Shaded Spruce somewhere on them to tie them in together for the most part.  I did add in a few additional colors to finish them off.  You will find a full list of the supplies I used on this card in the Shopping List below.  I just did simple coloring to fill in the images with just a little blending.  I kept everything super simple.  Once I had everything colored it was time to add the finishing touches.
I added the ink blended and colored background to a Thick Whisper White Card base cut at 4 1/4 x 11 scored at 5 1/2.  I did this with the aid of my Simply Score.  I put the card base in the corner and attached it with a little liquid glue.  I then stamped the sentiment in Blueberry Bushel ink on a scrap of Whisper White Thick cardstock and made it a fishtail banner.  I then popped the banner up on a few Stampin' dimensionals to attach it to the card.  I then added a few of the Snowflake sequins to the card with a little liquid glue.

Video Tutorial: 

If you are viewing this post by email you may have to click here or the image below to view the video.  
Thanks for dropping by today I hope that you have enjoyed my little card today.  I also hoped that I have inspired you a little to try ink blending and coloring with your Stampin' Blends or whatever alcohol markers you may have.  Again you will find a full list of the supplies used below.  
Happy Stampin' 
Rick Adkins 

If you live in the US.  I would love you to choose me as your demonstrator.  If you would like to purchase any of these products you can click on the Shop Now Button or by clicking on any of the images below.  Alternatively, you can also contact me by email to place your order.  Please be sure to use the monthly host code and I’ll send a little something out to you the following month to say Thank You!  

November HOST CODE:  QU2TJBJN
  1. Spend any amount with me this month and receive the Creative Stampers Tutorial Bundle.  Plus get a gift from me in December.
Please remember that if you use the host code you cannot use that order towards my KCRP’s (Kinmon Crafty Reward Points) that would be double dipping and is not allowed.  For more information on KCRP’s click here.  


Three main reasons to Join!  
1.     You Get at least a 20% discount on all your orders while you are a demo.   
2.     You get to join my fun Kinsmon Crafters Team and Private Facebook Group.
3.     Access to directions to all my online classes 

Stampin' Up! Shopping List: 

Price: $49.00

Template Designed by creativeworkerbee