Showing posts with label 3d project. Show all posts

Tuesday, December 15, 2020

Have a Sugar Sprinkled Season Donut Treat Packaging

 Hello and welcome to my blog; today I have a super cute and easy last minute Holiday treat & packaging idea for you.  This is also my project for this week's Last Minute Santa/Gift Ideas over at the Spot.  This project can be made in minutes and you can make a lot of them with just a few supplies.  Here's a look at my project.  

Have a Sugar Sprinkled Season Donut Treat Package The Spot #141 challenge Learn how to make this super easy treat package just in time for the holiday

Friday, October 30, 2020

Poinsettia Petals Gift Box Video Tutorial

 Hello and welcome to my blog; today on my weekly YouTube Live I shared how to create a fun and festive gift box using the Poinsettia Petals Stamp Set and products from the Poinsettia Place Suite of products from the August-December Stampin' Up! Mini Catalog.  I go live on my YouTube Channel each Friday at 11 am CST.  If you have not joined me for either my Facebook Live (on Wednesday) or my YouTube Live on (Fridays) I invite you to join me.  Here's a look at my project.  

Today on my weekly YouTube Live I shared how to create a fun and festive gift box using the Poinsettia Petals Stamp Set and products from the Poinsettia Place Suite of products from the August-December Stampin' Up! Mini Catalog.  Click here to learn more!

Tuesday, September 1, 2020

Poinsettia Petals Tall Box - The Spot Challenge #126 Anything But a Card

 Hello and welcome to my blog; today I am going to be sharing with you my project for this week's creative challenge over at The Spot.  This week we are doing a fun little creative challenge and the theme is Anything But a Card.  So I created a fun Christmas themed project for you today.  I used the products from the Poinsettia Place Suite to create my project.  Here's a look at what I came up with.  


I used a piece of Old Olive Cardstock to create the tall gift box.  My cardstock measures 8 1/2" x 10 1/2".  Once I had everything scored I added two pieces of the Poinsettia Place Designer Series Paper to two pieces of Real Red Cardstock.  I attached these two pieces to the panel that will be in the front and the back.  I stamped the large, medium, and small poinsettias onto Real Red Cardstock in Real Red Ink and used the matching dies to cut each layer out.   I layered each layer up with Multipurpose Liquid Glue.  


Once I had the Poinsettia flower put together I added one of the Beaded Pearls to the center of the flower.  I then added it to the front of the box with Stampin' Dimensionals.  I then stamped the sentiment in Old Olive Ink onto a piece of Whisper White Cardstock and punched it out with the Everyday Label Punch.  


Here's the inspiration for this week's challenge.  

Project Recipe: 

I have a little graphic for you so that you can pin to your Pinterest Board to remind you what I used to create today's project in case you wanted to recreate it.  You can find all my project recipes by clicking here.  


Thanks for dropping by today.  I hope that you have a wonderful day if you need any of the supplies that I have used today you can pick them up in my online store from the shopping list below.  

Happy Stampin' 
Rick Adkins 


Use the Host Code on any order of $35 (before taxes & shipping) or more by September 11th  and get invited to my September Monthly Card Class as a Thank You.  ($25 value)     If your order is $150 or more, please do not use the host code.  You will forfeit your Stampin' Rewards if you do; and I want you to get those rewards.  


If you place any size order with me during the month of August, you will receive the August Creative Stampers Tutorial Bundle from me as a little thank you.  This month's tutorial bundle has ten project tutorials that feature our favorite new Cozy Critters products from one of the new Stampin’ Up! Catalogs.  The Creative Stampers Tutorial Bundle can either be earned for FREE with any size order or Can be purchased for $22 from me.


I am very close to earning the 2021 Stampin' Up! Incentive Trip to Maui and your orders can help me get there.  I am running a few special promotions until the end of September to not only help me earn this trip but to help you save a little cash as well.   

Join me for an exclusive Online Stamp a Stack for World Card Making Day!  This is an exclusive event for my customers.  We will make 10 different cards during the event you can use whatever stamp sets you would like.  To join me it’s super simple place a $100 order before shipping and taxes in my online store using the provided host code attached to this link.  I will send you an invitation to this exclusive event.  You will not find these projects posted anywhere online.  And, at the end you will have a stack of cards to send out for World Card Making Day this year and all year long.  


With each $1000 I earn I will be cutting off a chain from my Maui or Bust Countdown Chain. 


Stampin' Up! Shopping List: 


Thursday, May 21, 2020

Dressed to Impress Box

Hello and welcome to my blog; today I am sharing with you the other box that I made last week and told you I would share it with you later.  This is a very famine version of the Beautiful World and 
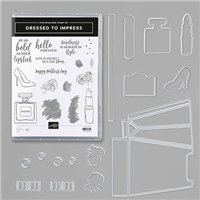
Forever Greenery Boxes I shared last week.  If you missed those posts, I have linked them for you above.   With this box I wanted to showcase the Dressed to Impress Bundle and products that are in that suite from the January-June Mini Catalog.  Sadly, most of these products are on the retiring list.   But I am quite sure everything I used is still available.  Here is a look at my project.  

Dressed to Impress Bundle, Best Dressed Designer Series Paper, 3D Project, Rick Adkins, Stampin' Up!

For this box you will need a piece of Petal Pink Cardstock cut at 8 ½ x 10 1/2.  I scored on the 10 ½” side at ½”, 3 ½”, 5 ½” and 8 ½”.  The other two score lines are on the 8 ½” side and they are at 2” and 6 ½”.  I told you it was simple.  The box is made the same as the other two so make sure to check out those post.  The Forever Greenery Box has a video tutorial that walks you step by step on how to make the boxes.  

Dressed to Impress Bundle, Best Dressed Designer Series Paper, 3D Project, Rick Adkins, Stampin' Up!

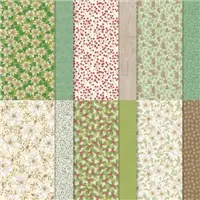
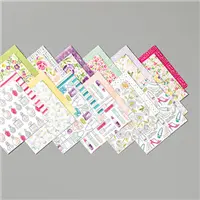
For this box I went with the stripped pattern from the Best Dressed Designer Series Paper Pack and added it to the front, two sides, and top.  I picked Purple Posy Cardstock to mat the designer series paper before adding it to the box.  I thought that the Purple Posy was a great choice to add to the box since it was in my chosen paper.  

Dressed to Impress Bundle, Best Dressed Designer Series Paper, 3D Project, Rick Adkins, Stampin' Up!

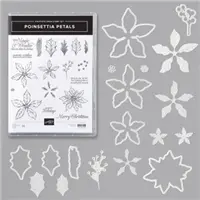
Next, I stamped the lipstick and perfume images from the stamp set in Basic Gray Classic Ink on Whisper White Cardstock and cut them out with the matching dies.  Then I added a little color to each image with the wash image from the stamp set.  There are a couple different size images to color the images without having to color.  I stamped the lipstick base in Basic Gray Classic Ink and the top in Lovely Lipstick Classic Ink.  The inside of the perfume bottle was stamped with Petal Pink Classic Ink.  

Dressed to Impress Bundle, Best Dressed Designer Series Paper, 3D Project, Rick Adkins, Stampin' Up!

After I had the focal images stamped and colored it was time to do a sentiment.  I stamped the Be as Bold as Your Lipstick Sentiment in Basic Gray Classic Ink on Whisper White Cardstock.  And then punched it out with a 2” Circle Punch.  

Dressed to Impress Bundle, Best Dressed Designer Series Paper, 3D Project, Rick Adkins, Stampin' Up!

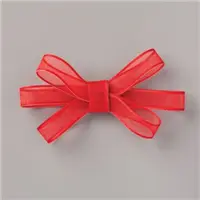
After all the stamping was complete, I took the 1/8” Sheer Mint Macaron Ribbon and tied around the box.  I then layered the perfume bottle and lipstick tube up on dimensionals.  I let the perfume bottle layer over the ribbon but still allowed the ribbon to slide through.  I then added my sentiment on dimensionals.  

Dressed to Impress Bundle, Best Dressed Designer Series Paper, 3D Project, Rick Adkins, Stampin' Up!

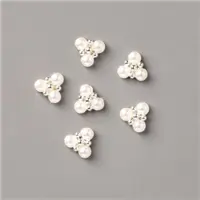
To finish off the box I added a few Basic Rhinestones to add just the right amount of sparkle and shine.  Thanks for dropping by today.  If you need any of the supplies you have seen today you can pick them up in my online store from the links below.  

Happy Stampin' 
Rick Adkins 


Use the Host Code on any order of $50 (before taxes & shipping) or more during the month and receive a gift from me in May as a Thank You. If your order is $150 or more, please do not use the host code.  You will forfeit your Stampin' Rewards if you do; and I want you to get those rewards.


If you place any size order with me during the month of May, you will receive the May Creative Stampers Tutorial Bundle from me as a little thank you.  This month's tutorial bundle features Birthday Bonanza Suite of Products from the January-June Mini Catalog.  The Creative Stampers Tutorial Bundle can either be earned for FREE with any size order or Can be purchased for $20 from me.

Stampin' Up! Shopping List: 

Template Designed by creativeworkerbee