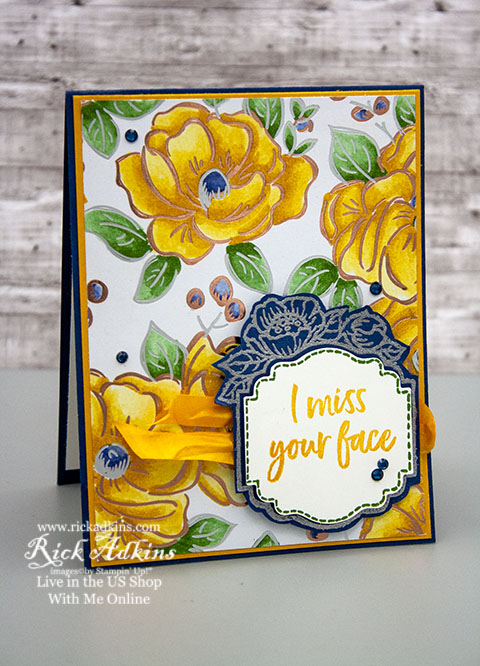
Hello and welcome to my blog; today I am going to share with you the 12 x 12 Sampler that I made the other day using the designer series paper from the NEW Ornate Garden Suite. The Ornate Suite of products will be in the Stampin' Up! 2020 Annual Catalog. The lovely flowers in the Ornate Garden Suite Collection are a modern take on classic Victorian florals. The gold foil accented paper, gems, and shimmery ribbon will add sparkle and elegance to your projects. You’ll love what you can do with this versatile collection. Share your gratitude with the included sentiments or pair with any sentiments for all-occasion projects. Here's a look at the sampler.

Tips & Tricks:
Samplers are a great thing to make for every occasion or holiday because they are great home decor pieces that are inexpensive and easily to make. Another great thing about samplers are that you can create them any way you want; there's no right or wrong way to make one. You can create a simple one the I did today. All I did was figure out how big I wanted my sampler to be. Typically most are 12" x 12" since that's a full sheet of scrapbook cardstock. But, I have made them as small as 6" x 6". Yes, there is a little math involved but, you can make that as simple or as hard as you want it to be. I decided simple was best. So I did simple math not this common core crap they are teaching kids nowadays. You know the math that your kids or grandkids bring home and it takes twenty steps to get to a two step answer. I did good old common basic math. I decided that I could get nine 3 1/4" x 3 1/4" squares on my 12" x 12" cardstock and it look visually appealing.

So with the first part decided I then knew that I would need nine 3" x 3" squares. So I cut pieces of the Ornate Garden Specialty Designer Series Paper and cut it down to 3" strips and then came back and cut that again at 3" the other way to get my squares. I then picked my coordinating colors So I went with colors in the paper (which is always a great way to pick your coordinating colors because Stampin' Up! did the work for us this makes it easy to pull colors you know will work together). I picked Old Olive and Terracotta Tile as my mat layers. So I cut five Old Olive squares at 3 1/4 x 3 1/4 (which only took 1 sheet of cardstock) and four in Terracotta Tile. Next I arranged the DSP onto each mat layer deciding what looked best which what color. Now mind you have not glued one thing down. So once I had the placement figured out I then arranged the matted layers onto my sampler base. Once I was happy with that is when I started glueing my designer series paper squares to my cardstock squares. At this point I went ahead and attached everything to my base. I always make sure to have the same margins on all four sides and I use a straight edge to line everything up. I look at this as building a house and I start at the bottom and add the first row, then the next lined up with the same boarder and then the top row. So think foundation, walls, then roof. After getting the house assembled I can start with the really fun stuff and stamp and embellish the sampler.

I started out then by stamping the two daisies from the Daisy Lane Stamp Set in Early Espresso Classic Ink. My ink pad was very juicy so I went with second generation stamping so it wasn't quite as dark. I stamped two of each daisy image from the stamp set twice. When punched out you need two of each to make a full daisy. So I added the small daisy which I stamped punched out with the small daisy punch and adhered together with a mini glue dot to the bottom left-hand side square up at the top. I am thinking I am going to go back and add one of the Perennial Essence Floral Centers to the center of the small daisy for a added extra color to this one and tie in the the yellows of the paper.

For my top right-hand square I added the large daisy made and stamped the same way as the little one. I added some of the old olive ribbon from the Ornate Garden Ribbon Combo Pack behind. The Ornate Garden Ribbon Combo Pack gives you double the creative options with two spools of silky, shimmery ribbon. Use it on cards, tags, treat packages, and more. You get 2 spools: 1 each of 2 colors (Old Olive and Terracotta Tile). Each spool is 5 yards per spool so that's 10 yards total. And the ribbon is a great size at 1/4" wide; which makes it great for every project. To attach the ribbon all I did was add a little Tear & Tape Adhesive behind where I wanted my daisy to go, and made a z pattern with the ribbon securing it into the Tear & Tape. Then I popped the daisy on top.

Next I used some scraps of Old Olive Cardstock and Terracotta Tile Cardstock to cut out the words Spring and time using the Hand-Lettered Prose Dies. I arranged the letters to go across to panels for my sentiment panels. I had Spring at the top and then off set the time in the center of the two. I then stamped "it's your time to shine" from the Daisy Lane Stamp Set onto a scrap of Terracotta Tile cardstock in Early Espresso. I made this into a little fishtail banner that I placed centered from the edge between the two die cut words. To finish off the sampler I added a few of the new Gilded Gems sprinkled around the sampler.
Video Tutorial:
If you do not see the video above you may have to click here to view the video. Some emails will not show the embedded video. Thanks for popping by today I hope you have a wonderful day.

Happy Stampin'
Rick Adkins
If you live in the US. I would love you to choose me as your demonstrator. If you would like to purchase any of these products you can click on the Shop Now Button or by clicking on any of the images below. Alternatively, you can also contact me by email to place your order. Please be sure to use the monthly host code and I’ll send a little something out to you the following month to say Thank You!


Use the April Host Code on any order of $50 (before taxes & shipping) or more during the month and receive a gift from me in May as a Thank You. If your order is $150 or more, please don't use the host code. You will forfeit your Stampin' Rewards if you do; and I want you to get those rewards.

If you place any size order with me during the month of April, you will receive the April Creative Stampers Tutorial Bundle from me as a little thank you. This month's tutorial bundle features eleven tutorials that use the outgoing 2018-2020 In Colors. The Creative Stampers Tutorial Bundle can either be earned for FREE with any size order or Can be purchased for $20 from me.
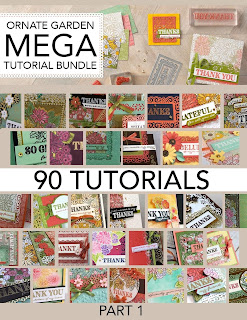
Order $50 (before shipping and taxes) of products from the Ornate Garden Suite of Products in my Online Store in April using the Host Code: ZPBUDHR7 and I will send you’re the Ornate Garden Mega Tutorial Bundle for FREE as a thank you gift. That’s 90 tutorials featuring products from the Ornate Garden Suite (a $21 value) free for purchasing products from the Ornate Garden Suite from me this month free.
Don’t want to order but still would like to get the Ornate Garden Mega Tutorial Bundle featuring 90 projects with both metric and Imperial measurements for each project! You can purchase it from me for $21.00 US as a instant download from my Tutorial Store.
Stampin' Up! Shopping List:
 |  | ||
 |  |  |  |

 Cardstock")