Snowflake Wishes Tealight Display Card - Video Tutorial
Hello and welcome to my blog; today I am going to share with you how to make a Tealight Display Card using the Snowflake Wishes Stamp Set; this is a great card to make for a friend or family member that you want to give something just a little extra to. This is a card that whomever gets it will want to put it out and show it off and you never know it may become part of their Holiday decor each year.
Tips & Tricks:
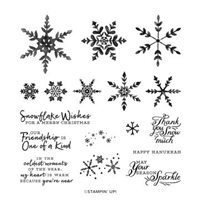
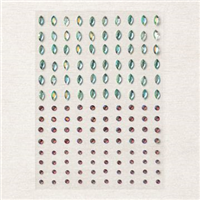
For the front of the card I used some of the Heartwarming Hugs Designer Series Paper to decorate with the Real Red Cardstock card base. I added another piece of the same DSP just the reverse side showing with a layer of Pear Pizzazz Cardstock. The snowflakes for the entire card comes from the die cuts that we got from created the inside panel. I added the sentiment from the Snowflake Wishes Stamp Set in Real Red Classic Ink on a 2 1/2' x 1 1/4" piece of Basic White Cardstock. I finished off the front of the card by adding a few of the Garden Gems to each of the snowflakes.
Once I had the front completed I needed a place to write a personal message on the card. Since the inside is taken up with the display part of the card. I decided to add a 4" x 5 1/4" piece of Basic White Cardstock to the back of the card. I added another sentiment from the stamp set in Pear Pizzazz Classic Ink in the middle of the panel. You will added a couple of the left over snowflakes to the back panel as well.
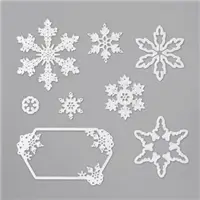
For the inside of the card you have to use a piece of cardstock cut at 6 1/2" x 5 1/2". On the 6 1/2" side you are going to score both ends at 3/4". Flip it over and line up the edge of the Basic White Cardstock panel at 3 1/4" and score. Take three of the dies from the So Many Snowflakes Dies and arrange them between the score lines on each panel. Run the correct sandwich through the Stampin' Cut & Emboss Machine. Repeat on the other panel. The big thing here is making sure that you do not place the die over any of the store lines. Add your Vellum Cardstock panels to the backside of the center panels.
Once you have the panels in you can attach the inside of the card. You are going to fold up the inside panel valley mountain, valley and place it in the card lined up at the top and bottom and just a 1/8" from the edge. Add strong adhesive to the top panel and close the card. Flip the card over and repeat the adhesive process. Close the back and open up now you have the inside pop out panel that is where you will set the Flameless Tea Light. To finish off the inside of the card add two strips of Heartwarming Designer Series Paper cut at 2 1/4" x 5 1/2" and the last snowflake. Now all you have to do is slide the card over the tea light and enjoy.
Video Tutorial:
Thanks for dropping by and make sure that if you want to get your hands on the products to make this project I will have a link below to order all the supplies that I used to created this card in the Stampin' Up! Shopping List posted below. If your order is over $50 (before shipping and taxes) and you use the host code this month I will send you a little gift as a thank you. You can always find the latest host code in the side bar to the right on my blog. Click here to shop with the October 27th - November 25th 2021 Host Code TYAP49VX
Happy Stampin'
Rick Adkins
My Eden's Garden Ordering Special:
Order the Eden's Garden Collection or $50 in Eden's Garden products from my online store from November 2nd, 2021 till January 3rd, 2022 and I will send you a set of four tutorials using the products in the collection Free as a Thank you!
Creative Stampers November Tutorial Bundle:
Get the November 2021 Creative Stampers Tutorial Bundle Free with any size order in my online store or it can be purchased for $22 in my Tutorial Store. This month's tutorial bundle features seven creative makes themed around Last Minute Christmas Gift Ideas! So, you will have some cute fun ideas to be ready for your last minute Christmas gift Idea needs for quick easy gifts for friends, co-workers, and those last minute needs. You may even find a few new favorite techniques or products while looking through it.
Join my Team:
Become a Kinsmon Crafters from November 4th - November 30th and you can take advantage of the Ultimate Bundle (the Stampin' Up! Starter Kit) at a discounted price! During the dates above you can join my team for only $75 and pick out $125 worth of new Stampin' Up! Products!
Plus be some of the first people to see and purchase NEW products before everyone else, be part of a fun crafting community, enjoy a discount of 20% on all your orders, the opportunity to attend demonstrator events, the potential to earn extra income! If you love securing free supplies and earning rewards, as a host of your own party, orders, or events that you have hosted then you’ll love the bonus benefits that come with being a part of the Stampin' Up! & Kinsmon Crafters Family!
Join me for the November Crafty Corner Monthly Online Card Club/Class. You can join the card club as a member for $39.00 a month and get all the perks of being a member or take the class for only $44.00 a month with no commitment. Click here to find out all the details and to register by November 20th to get this month's kit.
Rick's Kit & Paper Pumpkin Night:
Join me for a fun night online crafting with the Kits or the monthly Paper Pumpkin Box. Each month on the last Monday of the Month I will be holding a get together on Zoom where we will get together for a fun crafting experience!
How to attend
Purchase your kits from the New Kits Collection using this months Host Code TYAP49VX by the 15th of November (this will give you two weeks for your kits to ship to your house before the night of fun)
Or be one of my Paper Pumpkin Subscribers to be invited to the event. Remember that You have to be subscribed to Paper Pumpkin by the 10th of the month to get this months kit.


 \
\


0 Comments:
Post a Comment
Thanks for taking the time to leave a comment.
Much Love,
Rick